View Form & Survey Results
Learn how to view your form and surveys responses with Appcues

Written by Sofia Domingues
Updated at May 14th, 2025
Once you've created a form or survey and published it live, you can review user responses directly within the flow analytics page, or by exporting a CSV.
View Form & Survey responses in Appcues
The easiest way to view your flow's survey responses is within the analytics page of the particular survey flow:
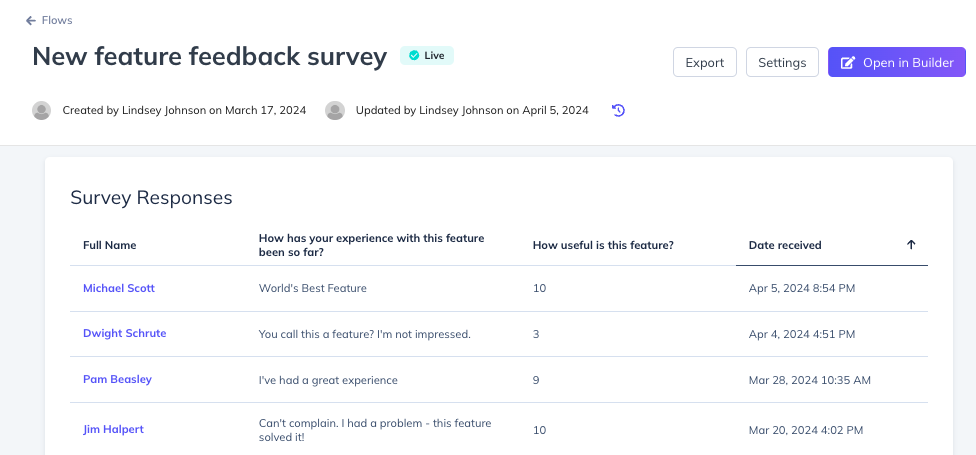
If your flow contains a form field or survey component, you will see the above table containing a record for each response you've collected. Each record will display the user ID (by default), each of the responses to the survey question(s), and the date and time that the response was recorded.
Pro Tip: Use the pen icon in the User Profile header to search for a user property that you want to display as the User Identifier for a given user. This user property will replace the user ID and populate as the first column of the survey table. We suggest choosing a property like Full Name or Email to quickly and easily identify the user.
Any date range filter you have applied at the top of the flow analytics page will apply to the data in the Survey Response table. If you are not seeing any responses, but you know your survey has collected at least one response, change the date range filter at the top of the page.
For mobile flow surveys, your question label that you entered within the Appcues (mobile) Builder will appear as the column header for each question.
For web flow surveys, the column headers are also populating based on what you have entered in the Appcues (web) Builder. If you have entered a Custom Reporting Label within the survey component's settings (in the Builder), that label will populate here. If you did not enter a Custom Reporting Label, but you did enter a Question Label that end users will see, that Question Label will appear as the column headers. If you did not enter any labels, we will auto-generate a column header for you. This will look something like “radio-abcde-12345-a1b2c3.” You can always change the column header by going back to the survey settings within the Builder to enter a Custom Reporting Label.

Export Form & Survey responses
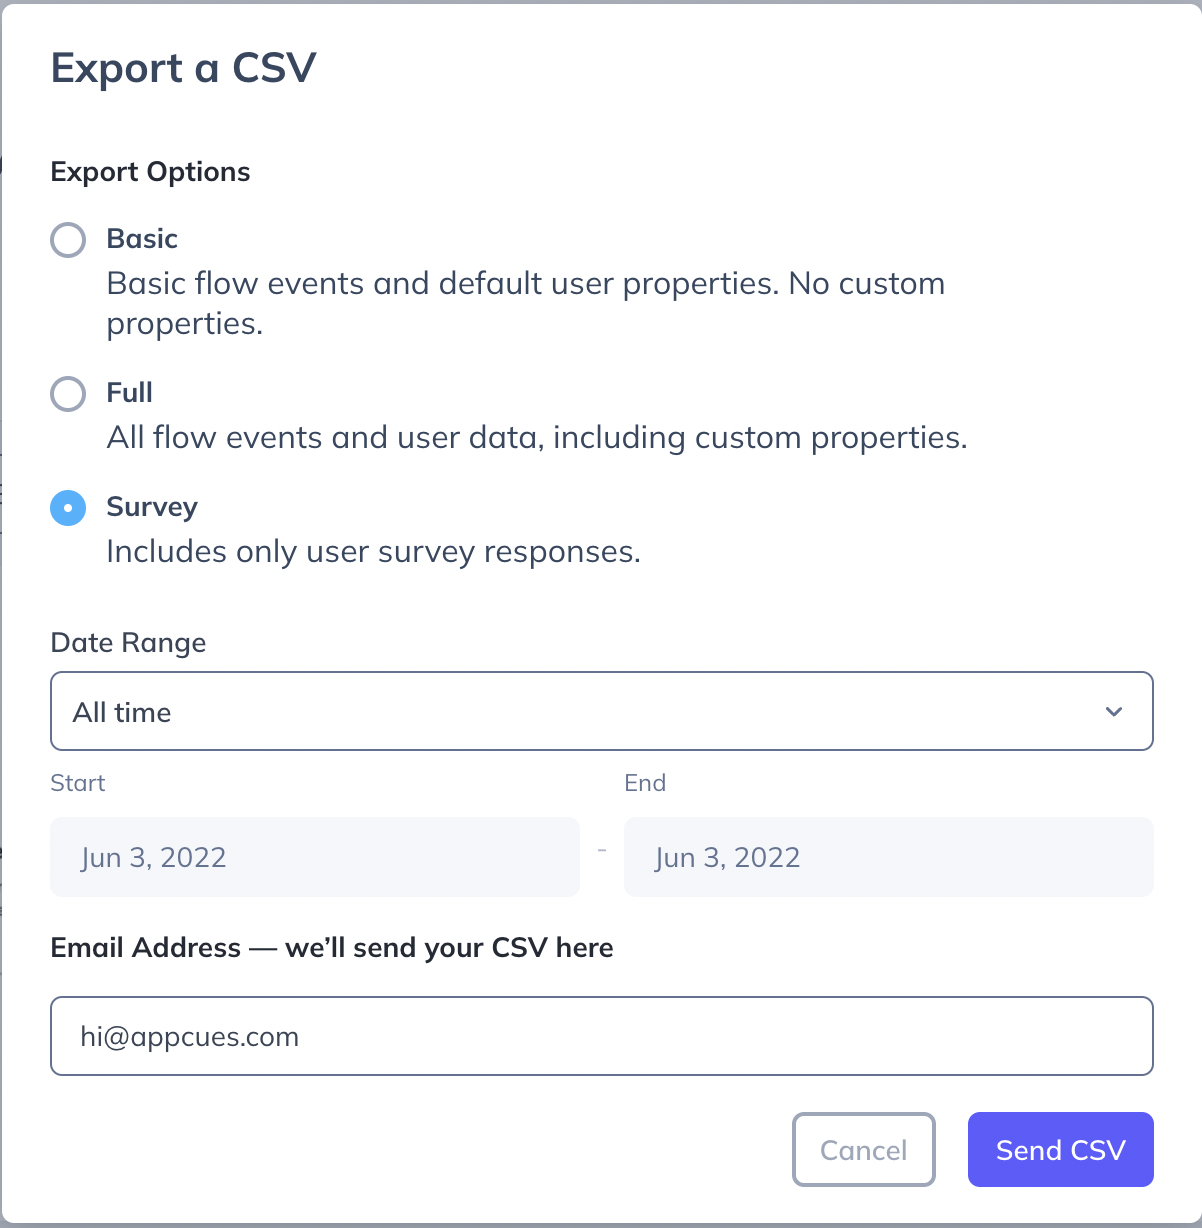
To further explore the survey responses collected from a survey flow , you can export the survey response CSV from the analytics page of the particular flow:

To see all form & survey responses for a user, click the “Export” button at the top of the page, then choose " Survey". The export will include one line per user, with their latest response per field and the date and time it was last submitted, in a condensed format that's easy to read.
Note: if the same user answers a survey more than once, only the most recent response is returned in the survey export. If you're looking to see all the responses, you'll need to select the full export.
If you need more detail or granularity, continue on to the next section.
Manually parse Form responses from a full CSV export
Individual form response events are included one by one in the Full and Basic CSV exports as well, but they require a lot of manual work to determine which responses came from which users.
You would only need to parse form events manually if:
- You need to correlate specific user properties with each response at the time it was submitted.
- You need to see all responses, not just the latest.
- You want to calculate the timing of when each form element was filled out, not just see the most recent time.
- You have other advanced needs that require viewing each form event separately.
If you don't need to do these kinds of advanced analyses, you should export "Survey" as shown above.
Once you received and downloaded your CSV via email, the easiest way to view the form response data is to import the CSV into Google Sheets or Excel. The example below uses Google Sheets.
The file will come in the email in a .zip format, so you may need to convert this to .csv before uploading it to your product of choice. On a Mac, you'll simply click the file, which will open it and automatically convert it to a .csv format. On Windows, you may need to use a conversion software like WinZip or 7-Zip.
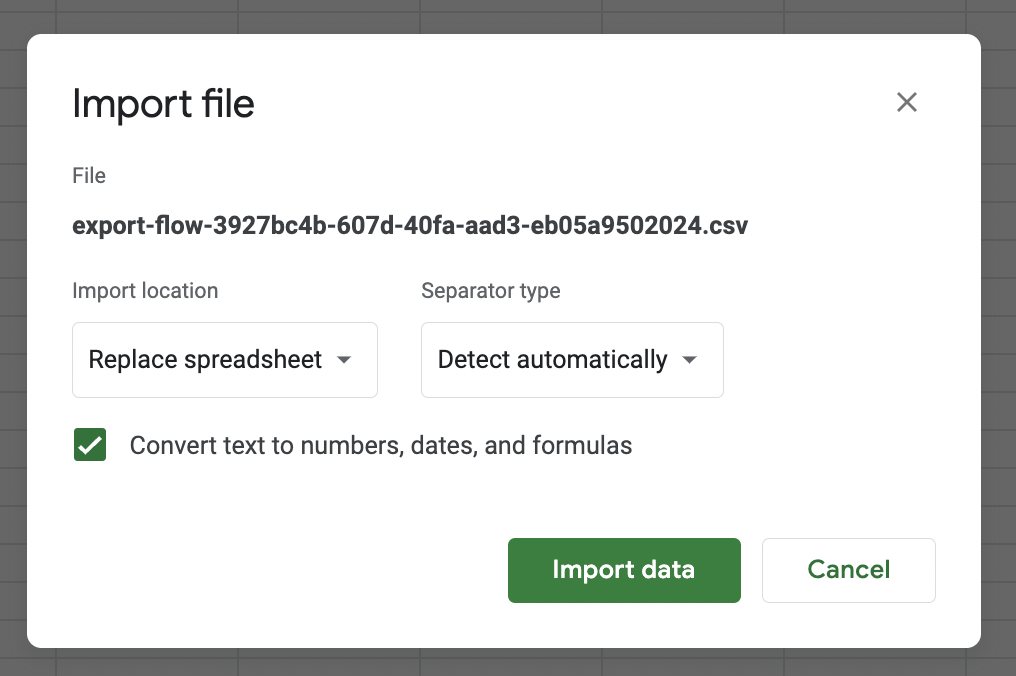
Step 1. Open your new sheet and in the 'File' tab, select 'Import'.

Step 2. You will then see a few options. You can choose whichever options make the most sense for you but, for a new Google Sheet, the default options will work just fine.
Step 3. Once the CSV is imported, in the 'Data' tab, select the 'Create a Filter' option.
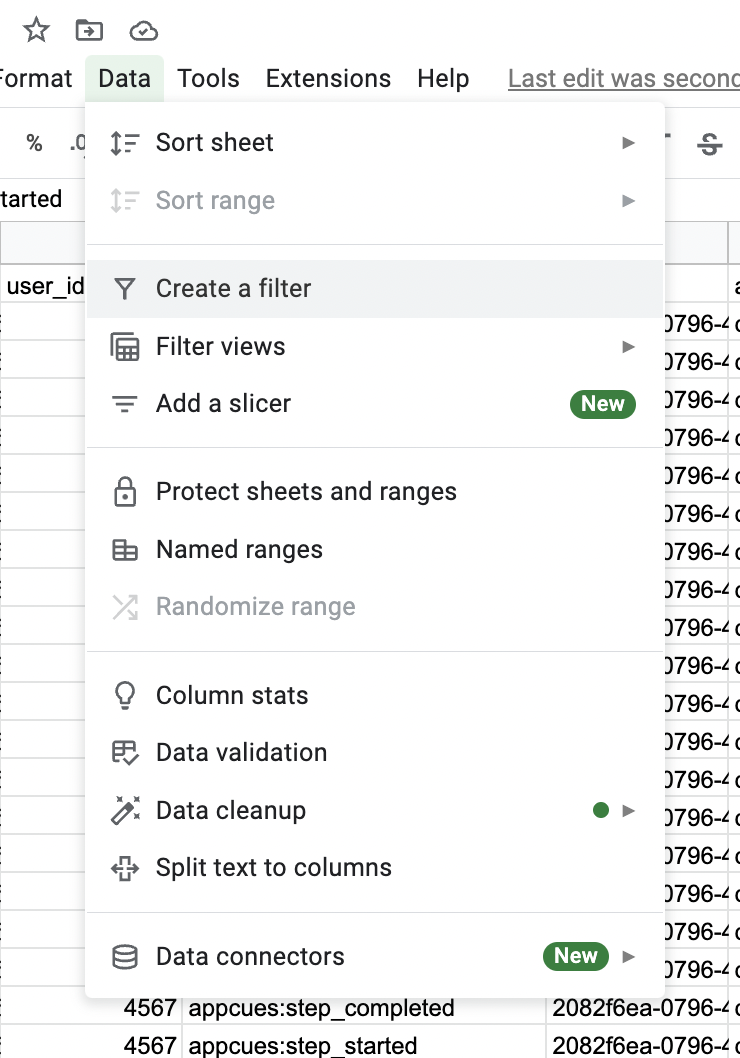
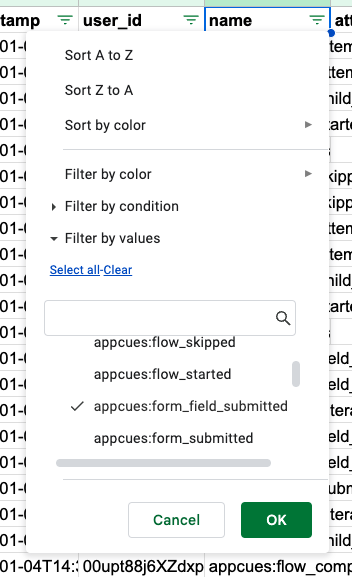
Step 4. Go to the 'name column' (it should be column D) to apply the filter. First, you'll need to 'Clear' all filters and then search by "appcues:form_field_submitted" to retrieve the results.
Step 5. For each of the fields in the form, there will be a column titled "attributes.interaction.value" followed by the question or label associated with that form field. In that column, you'll find the user's answer to the question. One of the columns in the spreadsheet will be titled attributes._identity.userId, which will indicate which user submitted this response.