Send an Email from Customer.io to Follow-up on your NPS
Learn how to use Customer.io to easily set up an automated follow-up campaign based on NPS.

Written by Sofia Domingues
Updated at June 11th, 2025
Appcues for NPS is the easiest way for product-led organizations to measure customer satisfaction - and it's built right into Appcues. But collecting the NPS isn’t enough! You need to take action on the score and feedback given by your customers.
Using your Customer.io Integration you can easily set up an automated follow-up campaign.
Build Guide
Step 1: Build and publish your NPS Survey in Appcues
Need help? Check out this article here!
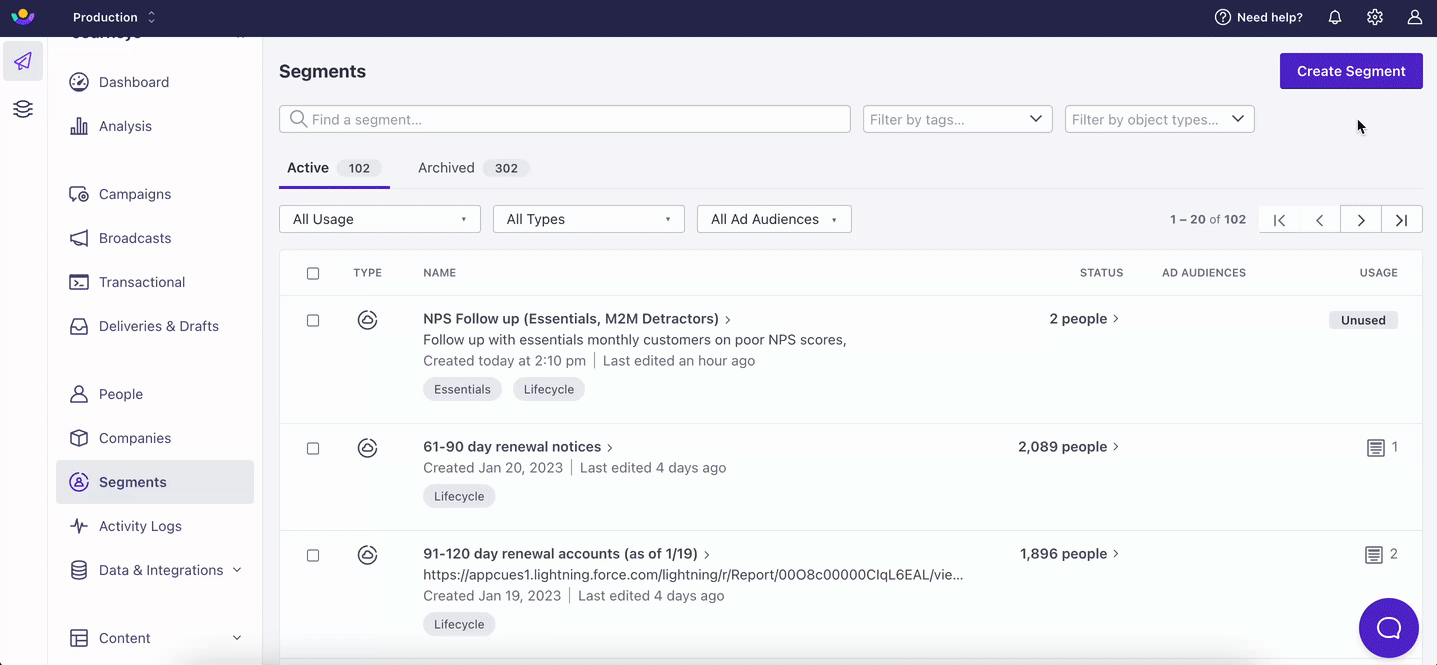
Step 2: Create a Segment in Customer.io for your NPS detractors, passive, and promoter scores
On the Segments page in Customer.io, click on “Create New”. Name your segment and choose “Data Driven Segment”. Once selected, you will select “Event” as your data point. You are looking for “NPS Score (Appcues)”. Once selected you will refine this event to whatever day range you would like and look for the event attribute of scores greater than 8, as this is for our promoters.
Step 3: Create a Campaign in Customer.io to automatically follow up with our users
In the Campaigns section, select “Create Campaign”.

Once you are in the creation stage, name your campaign, add a description, and use any tags if you are using them. Once finished, click on “Create Campaign”.
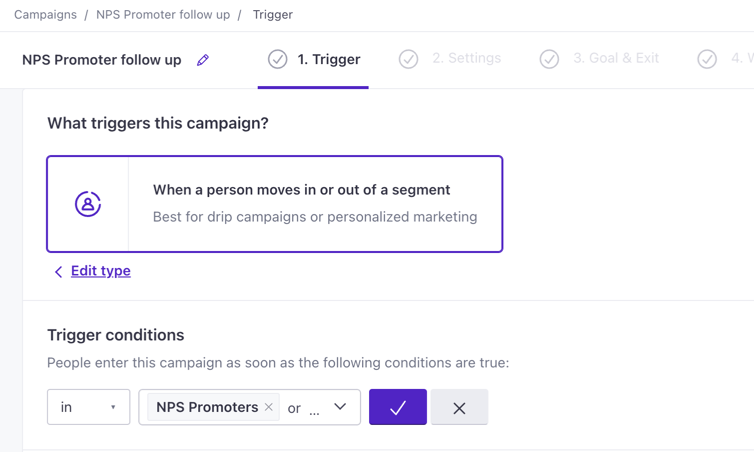
Step 4: Select the trigger
Here you will choose how you want the campaign to be triggered, you will want to choose “When a person moves in or out of a segment” and then select “Trigger confirmation”
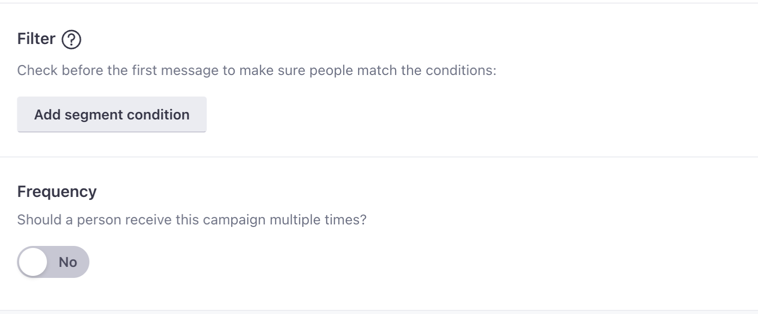
Step 5: Select the segment you created in Step 2
Now here is where you will select the segment you created in Step 2 and select the check mark to save the choice. Additionally, you can add filters and frequency limits.
Step 6: Save!
Select “Save & Next” and now select your message settings and select “Save & Next”.
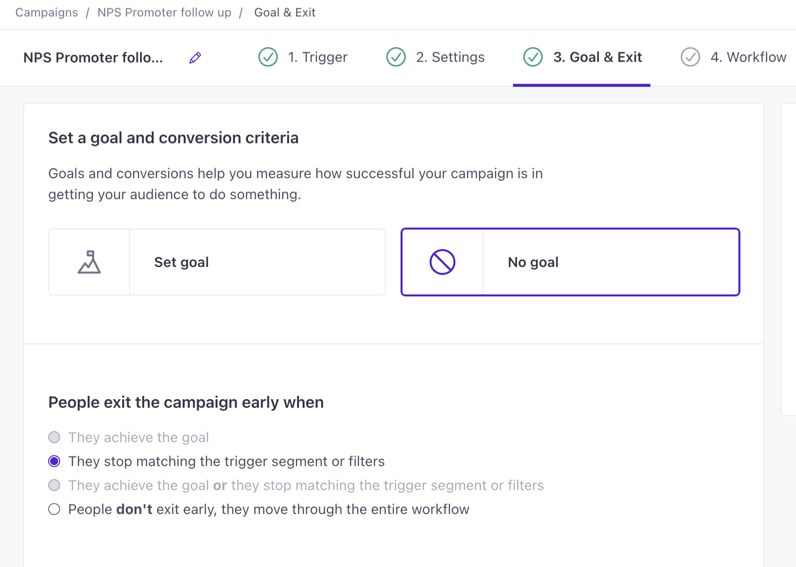
Step 7: Choose your Goal and Conversion
Here you will choose your Goal and Conversion settings. Now, you don’t have to select anything and for the purpose of this tutorial we are going to leave the goal as “No Goal” and the conversion as “They stop matching the trigger or filters”
Step 8: Configure workflow
You are almost there! Now you are in your workflow settings. You will drag over an email block from the left and drop it on your workflow. Once you have selected the email block, you will need to craft your email.

Step 9: Click on your new email block
Click into your new email block and select “Add Content”. Here you can create a new email, and select a pre-built one from your library or a template. Next, you will want to select your settings for the email.
Step 10: Review the configuration
Finally, you will move to Review and select if you want the campaign to send to everyone who currently matches and future additions. Or if you just want it to match for future additions.
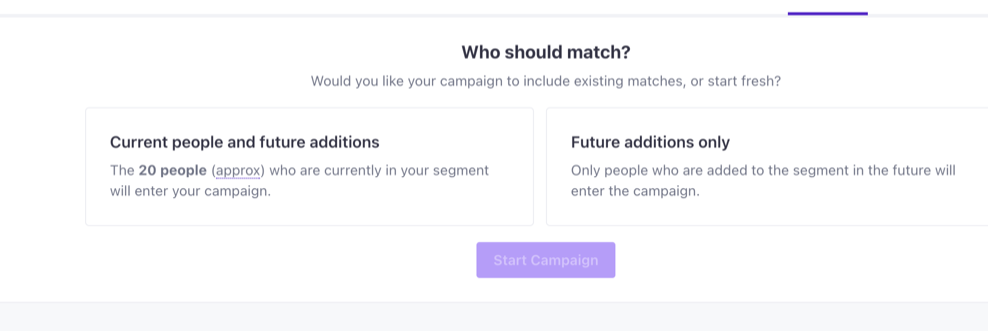
And that is it! Once you select “Start Campaign” an email will be sent each time a user leaves you a positive NPS score.
Happy Building!