Building email messages
Learn how to build email messages onto your workflows canvas

Written by Sofia Domingues
Updated at June 11th, 2025
Emails can be added as steps to workflows to send messages to your users when they’re not in your product.
Email Setup and Configuration
Before sending an email you will need to complete your email settings configuration and setup.
- Sending domain: Your sending domain should be set up as part of your initial email setup.
- Email Senders: These are the users that can be used as the sender of your email.
- Physical Address: This is the physical address associated with your business.
Creating an email
In a workflow, if you have email configured in your account, you will be able to select email from the options when adding a new node.
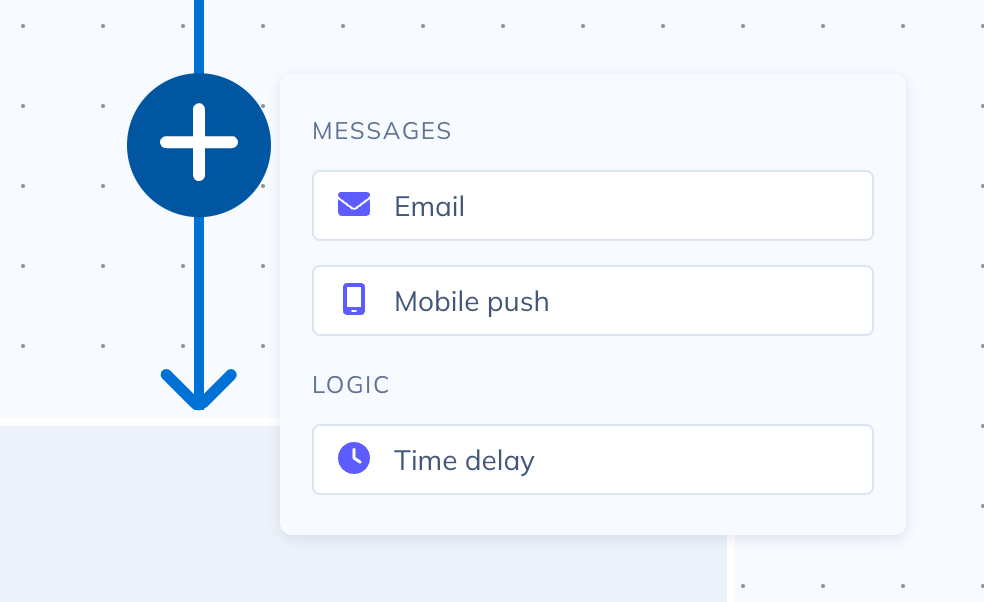
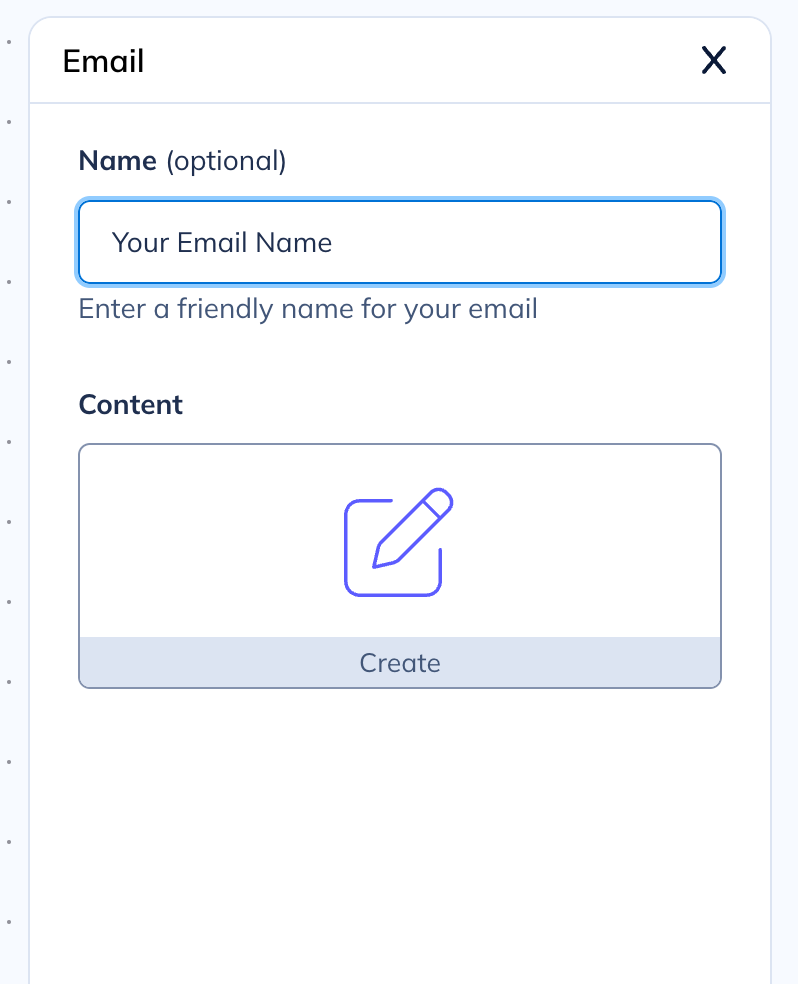
When you select the email option, a panel will be displayed where you can enter the optional name for the email and select the Create button to open the email editor.
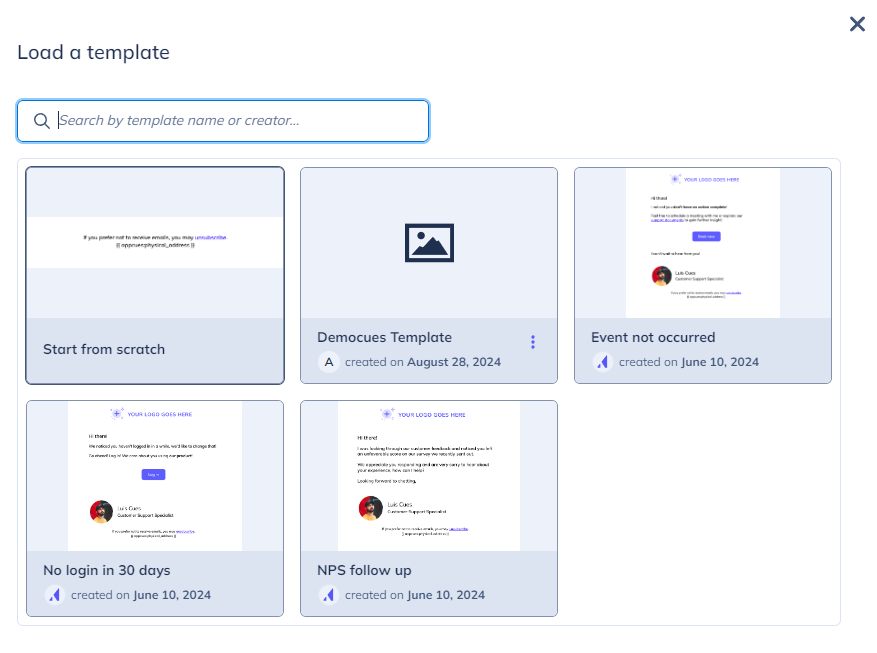
After you've given your email a name, you can either Start from scratch or load a saved email template. Clicking on the corresponding card will automatically take you to the builder.
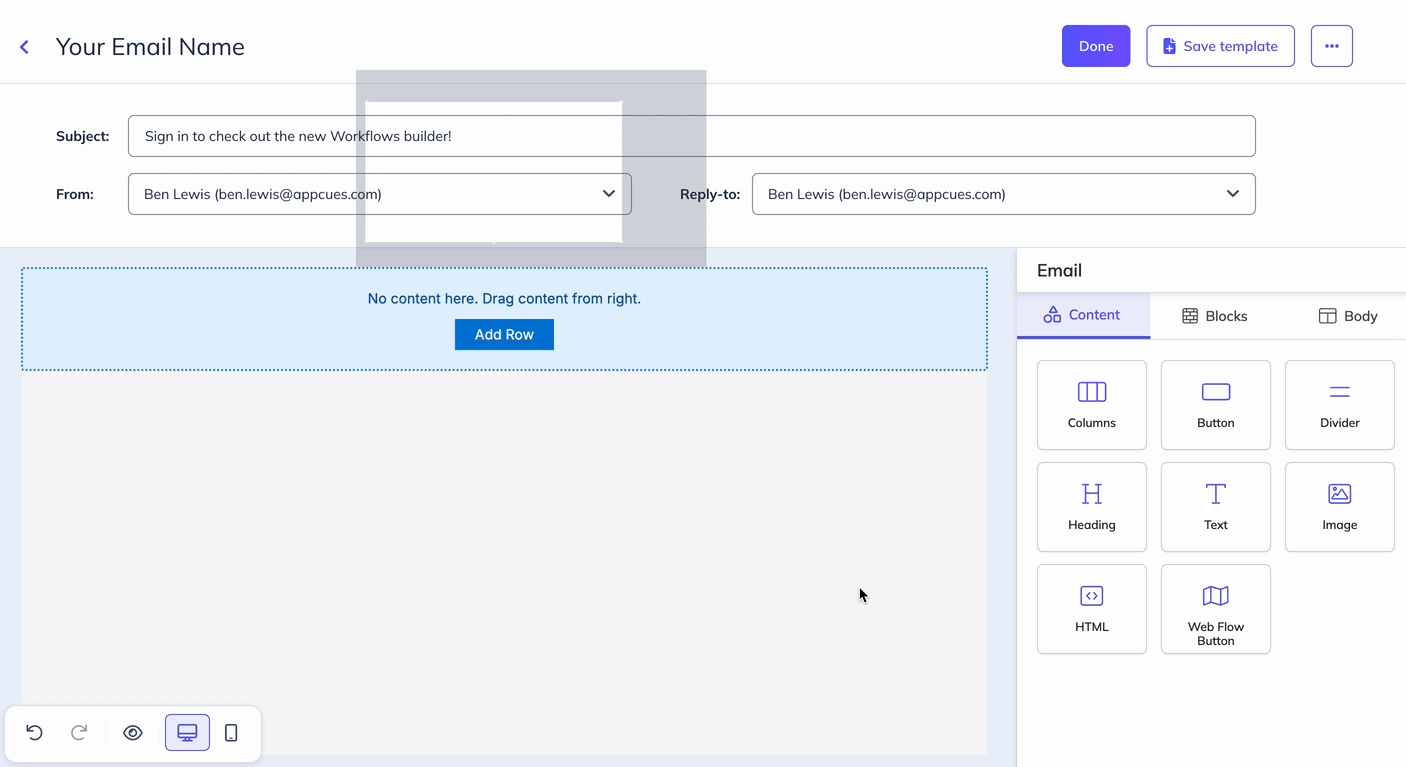
In the email editor, you’ll add the Subject, select the From email, Reply-to email, and build out your content with the side panel blocks.
Email Styling and Blocks
Our email editor supports several different content blocks to expedite your email building journey!
- Columns - Setup for columns in the email, when this is selected column layout options can be selected
- Button - A button with options to trigger opening a website, sending an email, of calling a phone number
- Divider - A line to visually separate content in the email
- Heading - Heading block
- Text - General text block
- Image - Image block with options for uploaded images or image URLs
- HTML - An open HTML block
- Web Flow Button - A button for triggering Appcues flows
- Signature - A custom block for adding the sender's signature to the email
- Unsubscribe - A custom block with unsubscribe information including unsubscribe link and physical address. This is required for all emails, when building in the HTML editor those can be included with the values {{ appcues:unsubscribe_url }} {{ appcues:physical_address }}
- Body - General styling for the email
Previewing an Email
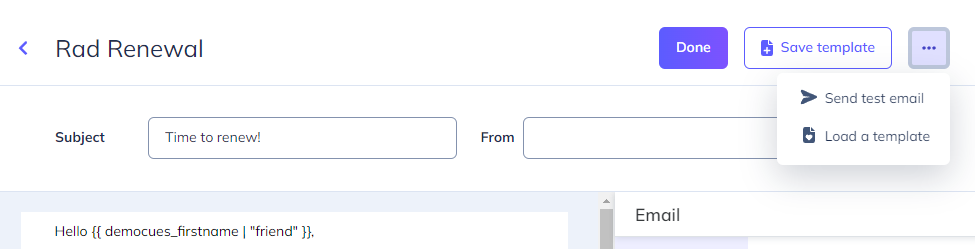
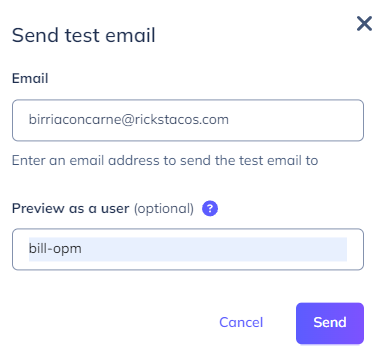
When you’re in an email select the ellipses in the upper right corner for additional options. Select the Send test email option and a modal will display with the test email settings.
In the modal enter the email that you would like to send the test email to. Optionally you can enter a user id, if you do any personalized fields will use values from that user’s profile if they are available.
Save email to template
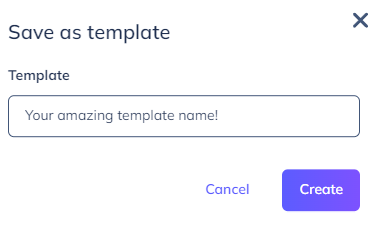
Love what you've built? Of course, you do! Save yourself some steps on the next email by clicking on the Save template button in the top right corner of the email builder.
Editing an email
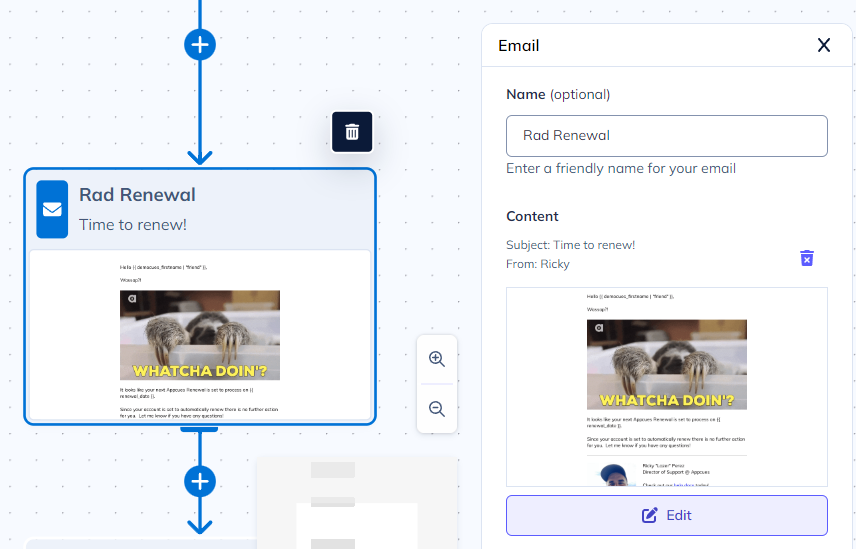
As long as your workflow is not published emails can be modified directly on the workflow canvas. Simply, click on the email message in question and then click the edit button on the right-hand panel.
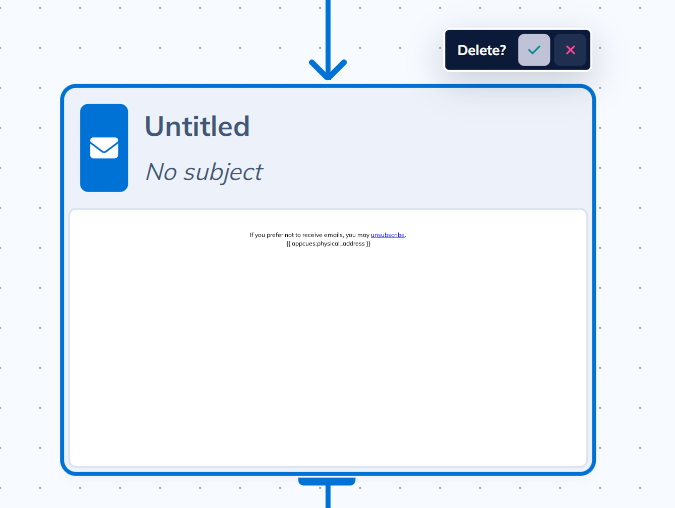
Deleting an email
Emails can be removed from the workflow canvas by clicking on the email node and then the trash can icon in the top right corner of the node. Afterward, you will need to confirm your deletion choice.
Publishing an email
Emails are controlled by the workflow that contains the email.
When the workflow that contains the email or emails is published all of the emails in the workflow will also be published
All required values must be included in the email in order for it to be published. These include the subject, a valid sender, unsubscribe link and physical address. Detailed instructions are available in the Configuring email settings doc.