Building Workflows
Create automated work flows to send email and mobile push notifications to your users

Written by Sofia Domingues
Updated at June 11th, 2025
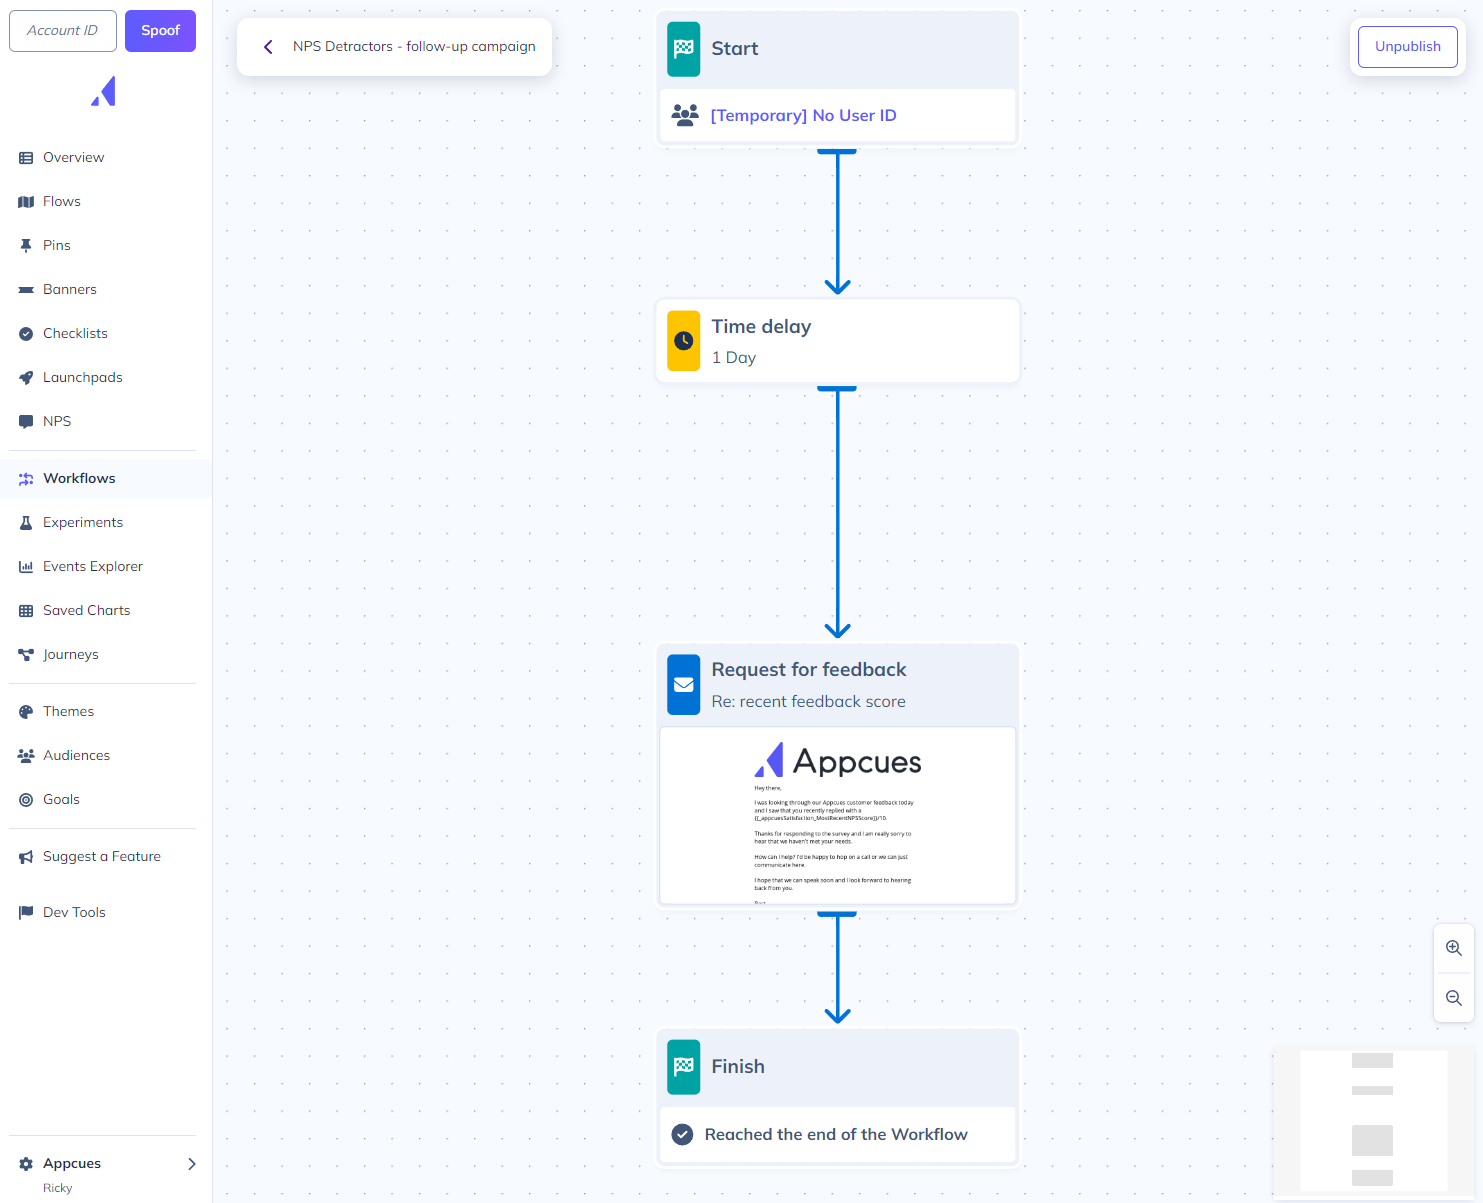
Workflows let you set up a series of actions that will occur for users sequentially without needing to be in the same experience. In a workflow, you can trigger additional messaging channel actions like emails and push notifications.
Creating a workflow
Workflows can be created from the Workflows page in Appcues Studio. When you’re making a new workflow all that you need to enter is the workflow name and the rest of the setup will be in the workflow of the settings for the messages that you want to send.
Currently, Workflows are limited to 75 total nodes per workflow.
Start Criteria
The start node lets you choose who can enter a workflow and what trigger will cause them to start it.
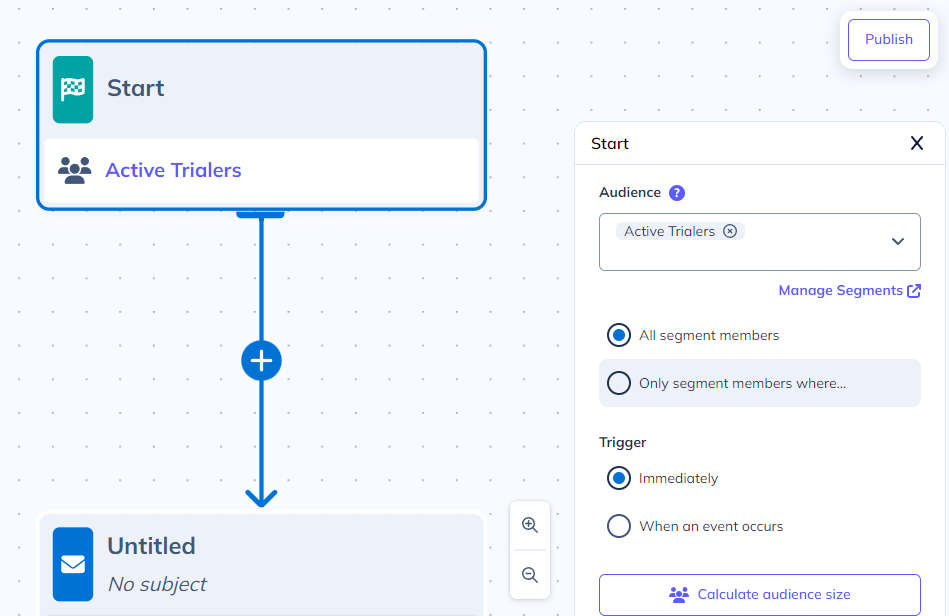
Audience
Audience settings allow you to choose segments eligible to enter a workflow. Users in any selected segment can trigger a workflow. You can decide whether or not to keep sending messages to users who are no longer in these segments under the Advanced exit conditions on the Finish node.
To refine the audience further, you can choose to target only segment members where a time-based user property (for example, “Last seen at”) was within a specific rolling time window.
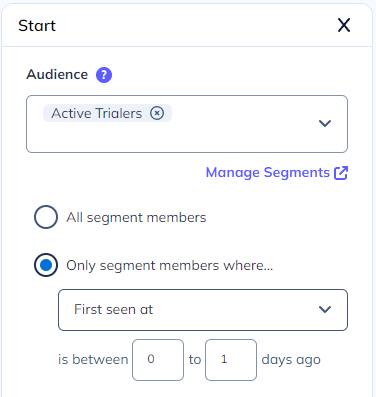
For example, if you want to target your workflow at only new trial users, you can select your Active Trialers segment (or any segment that contains your users who are on a free trial of your product). Select the Only segment members where… option. Click the First seen at user property from the drop down and adjust the value to be between 0 and 1 days ago. Depending on your finish criteria these users can remain in the Workflow for the duration of their trial or until they finish the workflow, but only trial users who are less than a day old will be enrolled in the Workflow.
Changes made to a Workflow's starting segment will not apply to users who have already entered a segment. Instead it will impact new users who qualify for the segment from the point of the edit forward.
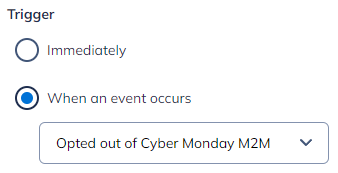
Trigger
Users who meet your audience criteria can trigger the Workflow by completing a goal, performing an event, or simply being a member of the segment.
Immediately
Users will start the Workflow as soon as they meet the audience criteria if “Immediately” is selected as the trigger. This includes users who meet the criteria at publish time as well as users who qualify afterward.
When an event occurs
Users who trigger an event up to two hours before publishing the Workflow or any time afterward will start the Workflow if an event is used as the Workflow trigger.
Messages
After configuring your email settings, an email action will trigger an email to be sent to the user when the action is reached. To add an email to your flow click the + icon, select Email, optionally add a name for the email action, and select Create.
You can then build the email and return to the workflow. For a complete guide on email creation check out our email building doc.
By default emails will use the default sending window and frequency limit set in your account email settings.
For individual emails you can override these settings.
Under ‘When can this email be sent’ you can set emails to send at all times or at specific times that are different than those in your account settings.
Under the Advanced settings you can set an email to override the email frequency limit.
Email node progression
With email nodes in a workflow you can set the workflow to only progress to the next node in the workflow after an email is sent or skipped, delivered, opened. You can also set the workflow to progress immediately without waiting for an email action.

If an option to wait for an event is selected you can additionally select to set a maximum wait time.
With this option, if the user has not already progressed to the next node in the workflow, they will be progressed to the next node in the workflow when the time elapses.
Mobile Push
A Mobile Push action will trigger a push notification to be sent to the user when the action is reached. Before being able to send mobile push notifications, your apps will need to be set up to allow push notifications from the Appcues SDK. To add a push notification to your flow click the + icon, select Mobile push, optionally add a name for the email action, and select Create.
You can then build the push notification and return to the workflow. For a complete guide on this messaging type check out our building mobile push notifications doc.
Logic
True/False Branch
You can set custom messages to occur or not occur based on true/false branching logic. This logic is based on a custom condition having occurred (or not) that you define directly in your workflow.
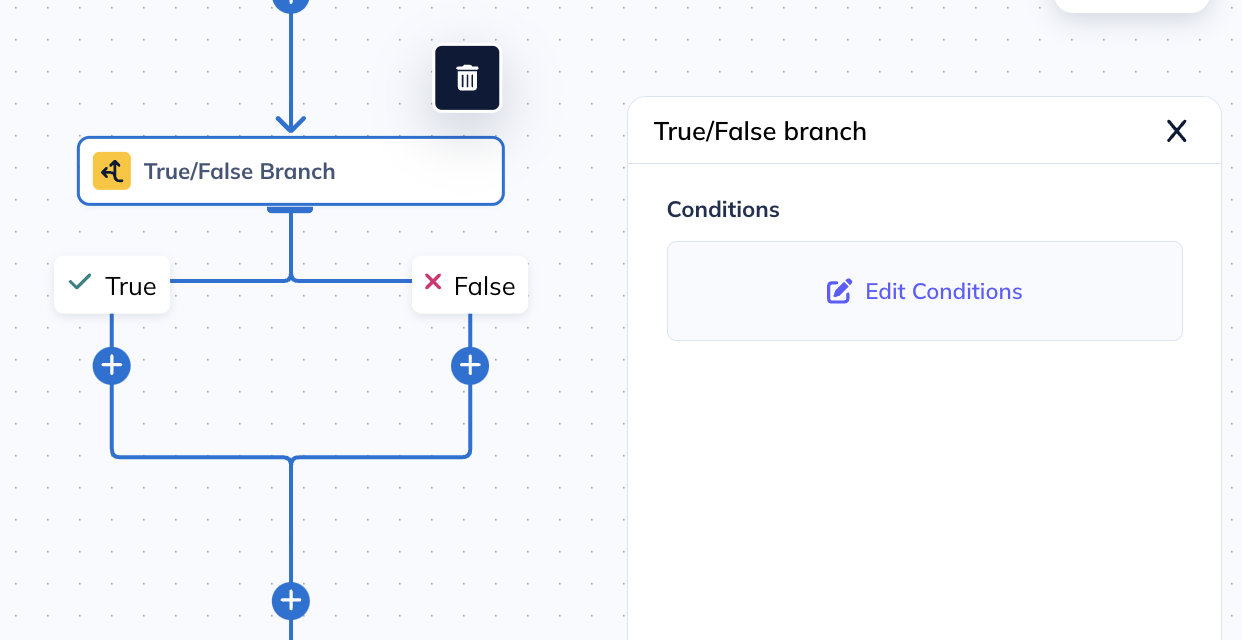
After selecting the True/False Branch node, you can click on the Edit Conditions button on the right side. From here you will establish the conditions for your true/false branch. These conditions can be based on similar targeting conditions including user and group properties, experiences, custom event logic, and much more.
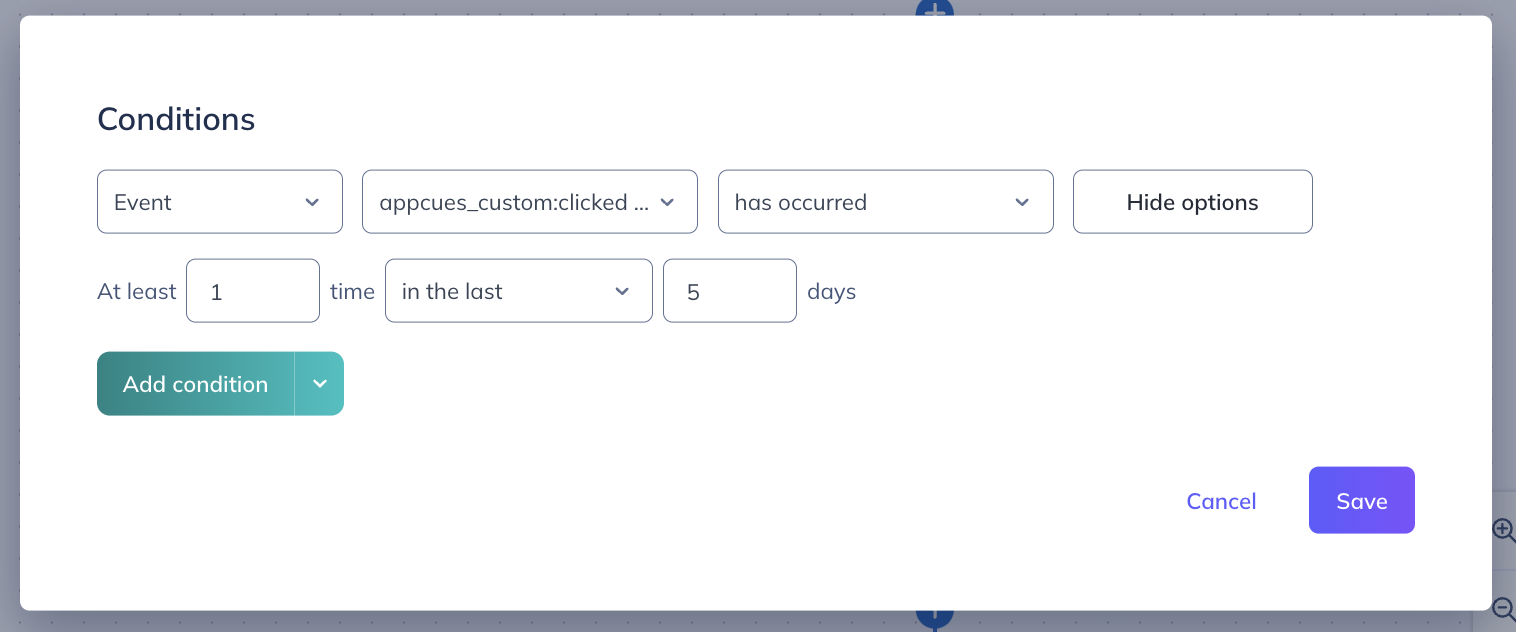
After you have your conditions set, click on the Save button.
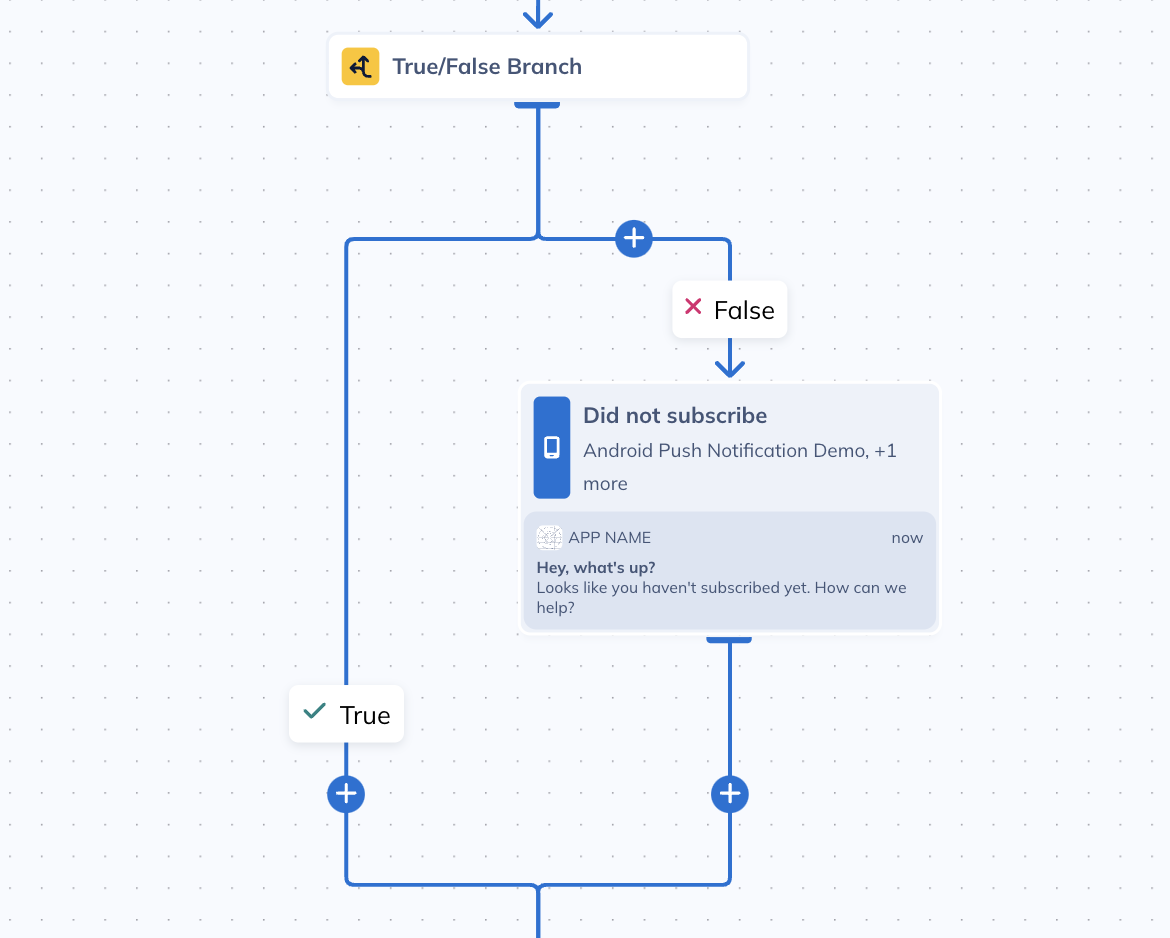
Email and Push Notifications can be added directly to the True and/or False branches by clicking on the blue add symbol.
A/B Testing
True/False branches can be used for A/B testing your Workflow. For example, if you want to A/B test two versions of an email or push notification, you can add a True/False branch and use the audience randomizer user property to divide the audience. For best results, use the True/False branch to evaluate whether the number is greater than or equal to 51.

NOTE: The Audience Randomizer property is a number from 1 to 100 randomly assigned to users upon their first login. As this is a random assignation for each user, it is possible for more users to have an Audience Randomizer less than 50 than there are users with a number greater than 50 (or visa versa), meaning there is no expectation that these two groups will be completely evenly split. This may be a concern if working with fewer users in your account, as the difference in split will statistically decrease as the group sizes increase.
Time Delay
A time delay will delay users in the workflow until the time delay has been reached.
After a period of time
This delay is based on when the previous workflow step has been completed for the individual user. When the user has completed that step, the workflow will wait for the set amount of time and then progress the user to the next step.
After a specific date & time
This delay is based on a fixed time and date. If a user in the workflow reaches this step before the set date and time the workflow will wait until that date and time and then the users will progress to the next step.
Any users that reach this step after the set date and time will progress to the next step without waiting.
Data
Track Event
You can add a node which tracks a custom event once a user reaches it. These events can have any desired name and will appear in the Events Explorer under “Application events.” They can be used to target or trigger other Appcues content, create Segments, or to send to other tools via integrations.

Update user property
You can use this node to update up to 10 different user properties once a user reaches it. To set a new user property value, choose an existing user property from the droplist and then type the new value that you wish to set.

TIP: Tracking events and updating user properties are great ways of connecting In-Product and Out-of-Product messages. Learn more in this article.
Finish Criteria
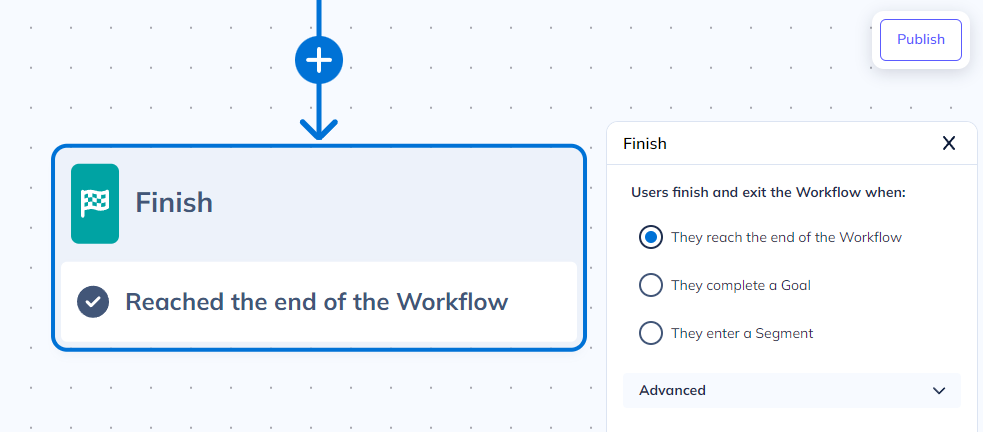
The finish node lets you choose when the user exits the Workflow and how to handle users who have already finished it.
Exit conditions
There are 3 ways to determine when users finish and exit the workflow.
They reach the end of the Workflow
Use this option if you want users to pass through all required nodes in order to finish and exit the workflow. Only users who time out or no longer qualify (if applicable) will exit the workflow otherwise.
They complete a goal
You can use goals as the criteria for finishing and exiting the workflow. If this option is selected, the user can finish and exit the workflow before reaching all of the nodes if they complete the goal first.
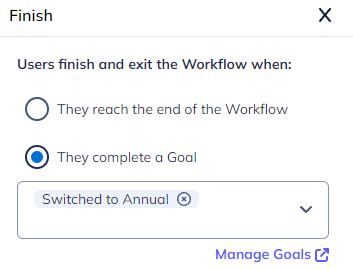
Note that users who have already completed the goal will be excluded from entering the workflow. This will be reflected in the Workflow's audience calculation.
They enter a segment
You can use segment membership as the criteria for finishing and exiting the workflow. If this option is selected, the user can finish and exit the workflow before reaching all of the nodes if they enter the selected segment first.
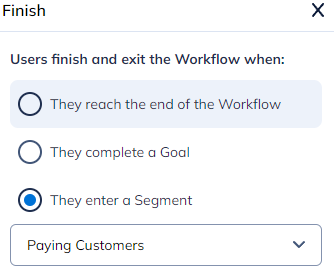
Users who are already in this segment will be excluded from entering the workflow. This will be reflected in the audience calculation.
Advanced settings
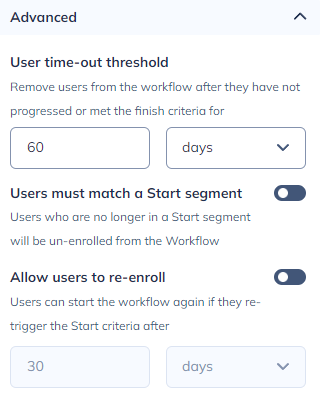
User time-out threshold
There is a mandatory time-out threshold for users who do not progress in the workflow or meet the finish criteria. By default, this threshold is set at 60 days and can be changed up to a maximum of 9999 days. Users who exceed this threshold will be exited early without being considered finished.
Users must match a Start segment
Toggle this setting if you require a user to remain part of one of the segments chosen in the Audience section of the Start node. If toggled on, users in the workflow who no longer qualify for any of those segments will exit early without being considered finished.
Note that this setting only considers the Start segment, not any time-based criteria used to refine the segments further.
Allow users to re-enroll
If you wish to allow users who have finished the workflow to be able to start it again, you can enable this setting and set a waiting period for re-enrollment eligibility. Users who have passed the waiting period and re-trigger the Workflow will start it again.
Note:
- If goals are used as the trigger or finish criteria, users will not be able to enter the Workflow again.
- If the trigger is set to “Immediately,” users who are still part of the start segment will restart the workflow immediately upon finishing the waiting period
Publishing the workflow
When the workflow is complete it can be published. In the publish process it will provide an estimate of the users that will qualify for the workflow based on their current user settings. When the workflow is published all content inside the workflow such as emails and push notifications will also be published (those messages will be sent when the user reaches the related step).
Before you can publish a workflow, you will need to ensure you have configured your account's Physical Address within your email sender settings.
Modifying a published workflow
If you need to make a change to any step of your workflow after it has been published you will need to first unpublish your workflow. After the workflow has been unpublished feel free to edit any steps necessary. Users' workflow progress will automatically be saved and resume after you republish your workflow.
Use caution when removing Workflow steps after a workflow has been published. Doing so can cause the user to enter in an orphaned state and no longer be able to progress through the workflow.