Contact Us

If you still have questions or prefer to get help directly from an agent, please submit a request.
We’ll get back to you as soon as possible.

Please fill out the contact form below and we will reply as soon as possible.

  • Contact Us
  • Home
  • Web Experiences
  • Use Cases

Welcome your Users with Appcues

Learn how to create a welcome message to make your users feel at home.

Written by Sofia Domingues

Updated at May 14th, 2025

Contact Us

If you still have questions or prefer to get help directly from an agent, please submit a request.
We’ll get back to you as soon as possible.

Please fill out the contact form below and we will reply as soon as possible.

  • Installation & Developers
    Installing Appcues Web Installing Appcues Mobile API & Data Troubleshooting Extras
  • Installation & Developers
    Installing Appcues Web Installing Appcues Mobile API & Data Troubleshooting Extras
  • Web Experiences
    Building Web Experiences Targeting Studio Customization & Styling Use Cases Troubleshooting FAQ
  • Mobile Experiences
    Installation & Overview Building Mobile Experiences Mobile Analytics & Integrations Troubleshooting
  • Workflows
    Building & Configuration Use Cases Workflow Analytics and Integrations
  • Account Management
    Subscription Users & Data
  • Analytics
    Experience and Event Analytics Data
  • Best Practices
    Best Practices Use Cases Pro Tips Product-led Growth
  • Integrations
    Integration Documents Use Cases Extras
+ More
  • Home

  • Installation & Developers

    • Installation & Developers

      • Web Experiences

        • Mobile Experiences

          • Workflows

            • Account Management

              • Analytics

                • Best Practices

                  • Integrations

                    A welcome message is an easy way to get started with Appcues and will have a great impact on a new user's perception of your application right from the start.

                    A welcome message:

                    • Is a way of introducing the human side of your product and lets users know you appreciate their business
                    • Sets the stage for more content to come (maybe immediately)
                    • Can expedite users completing tasks toward “activation”

                    Build Guide

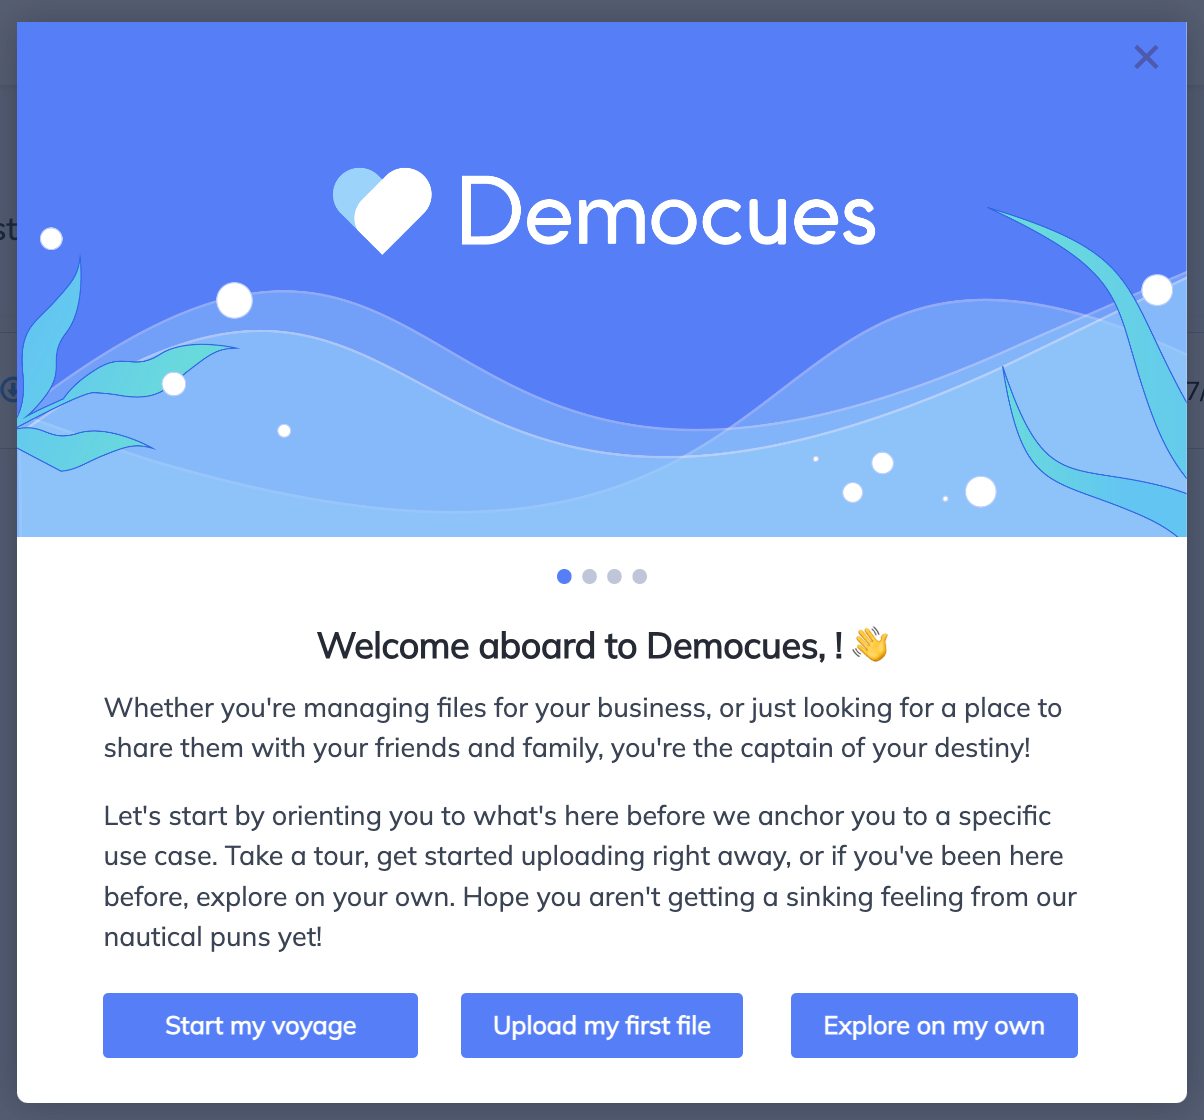
                    The final product of your Modal will look something like this when we're done:
                    Step 1: Add the Modal

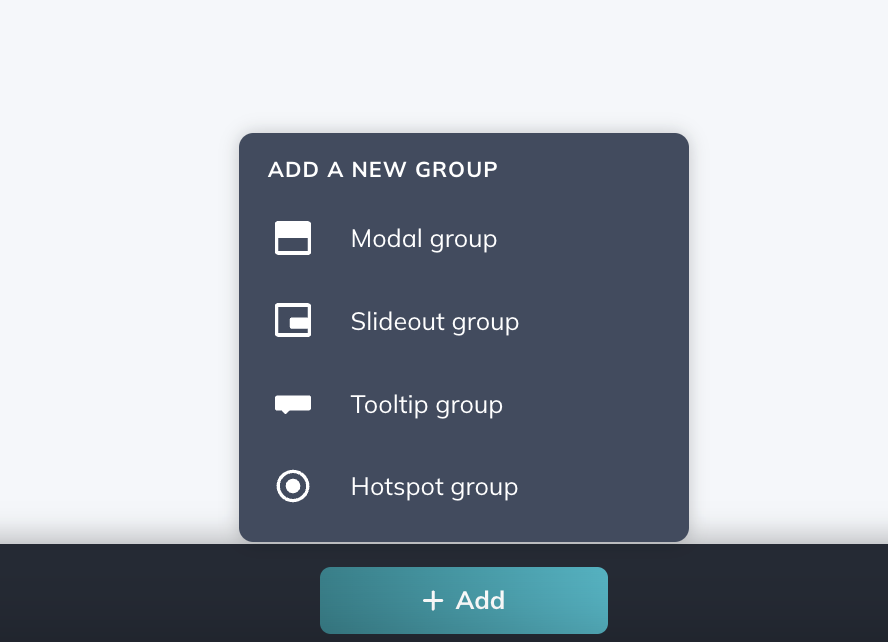
                    First, open the Appcues Builder to create a new flow and name it. Then, click on ‘+ Add’ and select ‘Modal Group’.
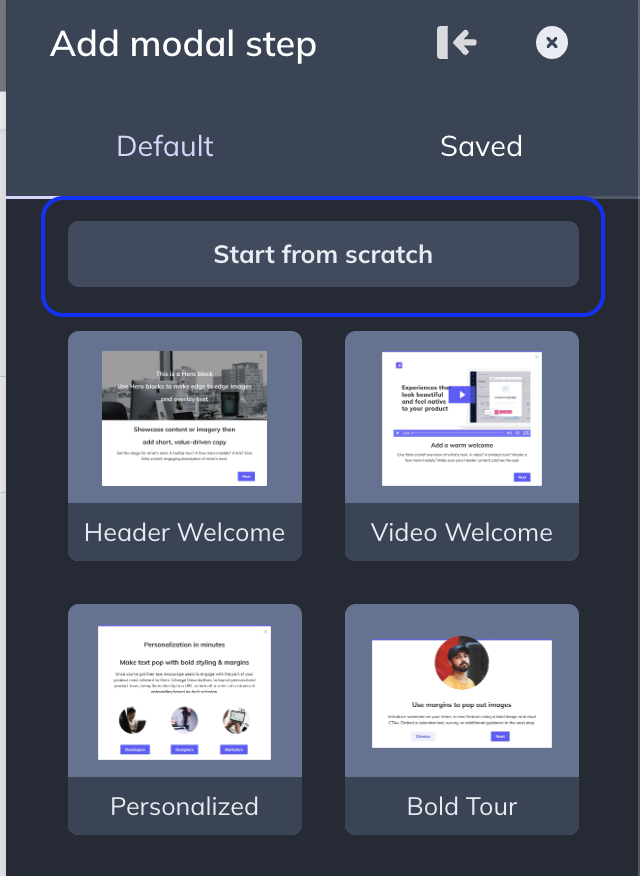
                    Select ‘Start from scratch’.
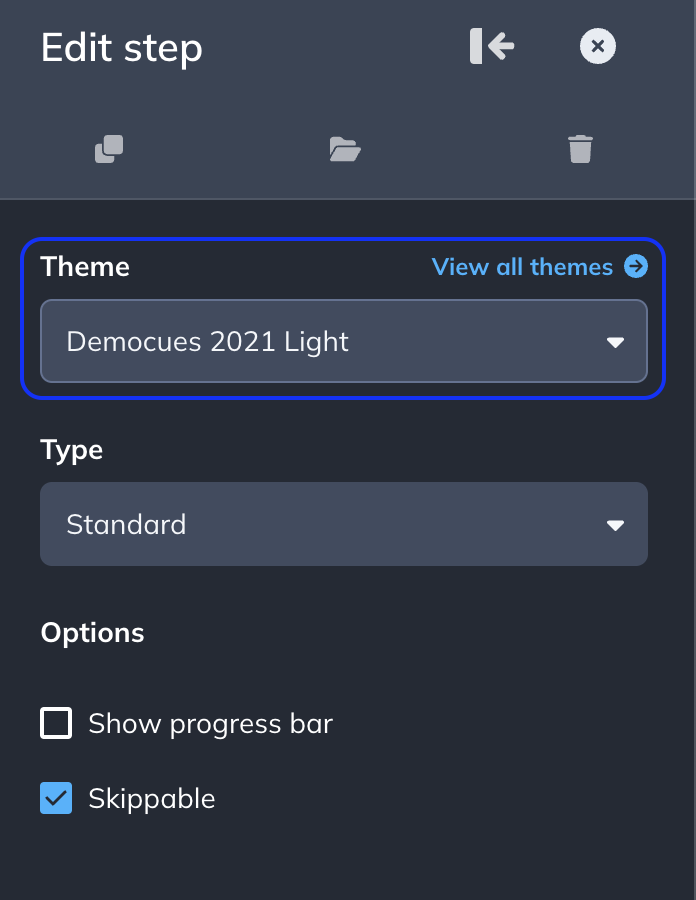
                    Make sure you're applying your brand's Theme to this Flow. This is a quick way to ensure your Flows look native to your product.
                    Step 2: Add components to your Modal

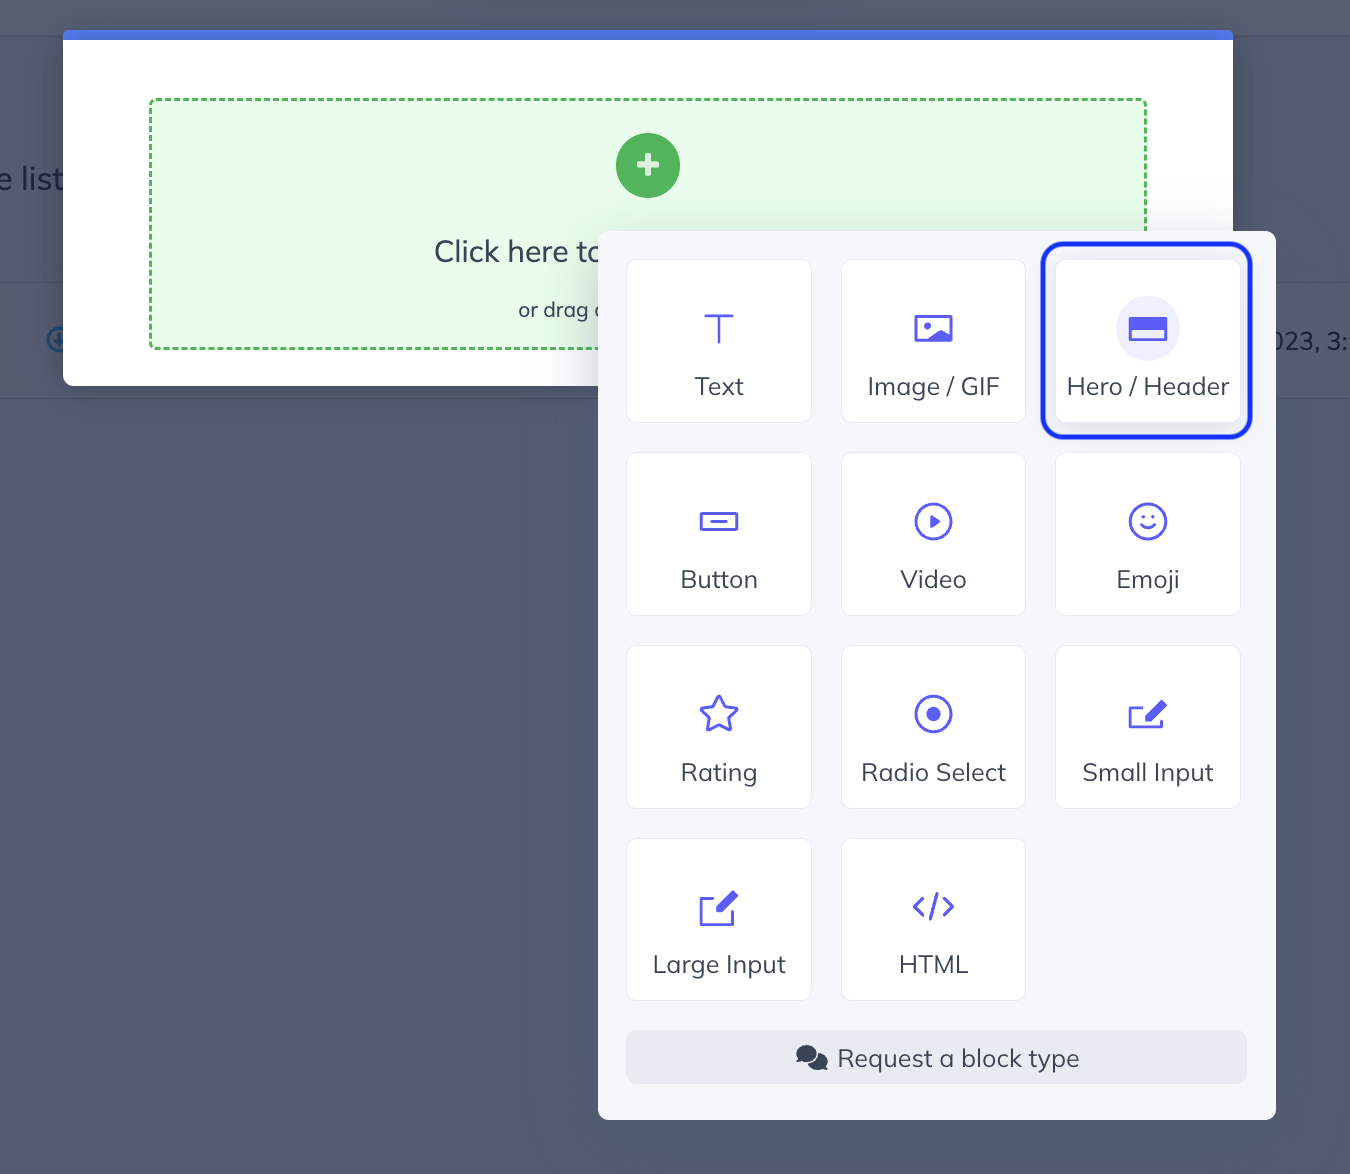
                    Start by adding a Hero Image. This image should contain your brand name or logo.
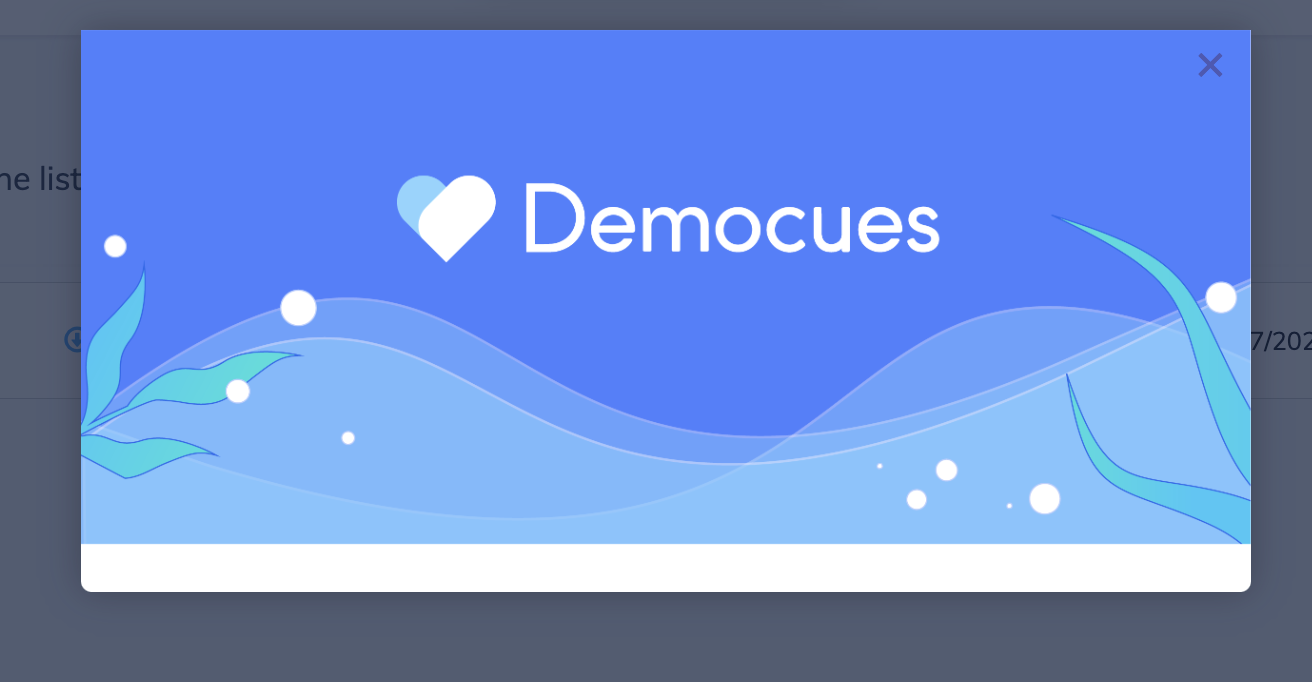
                    It looks like this once it's uploaded.
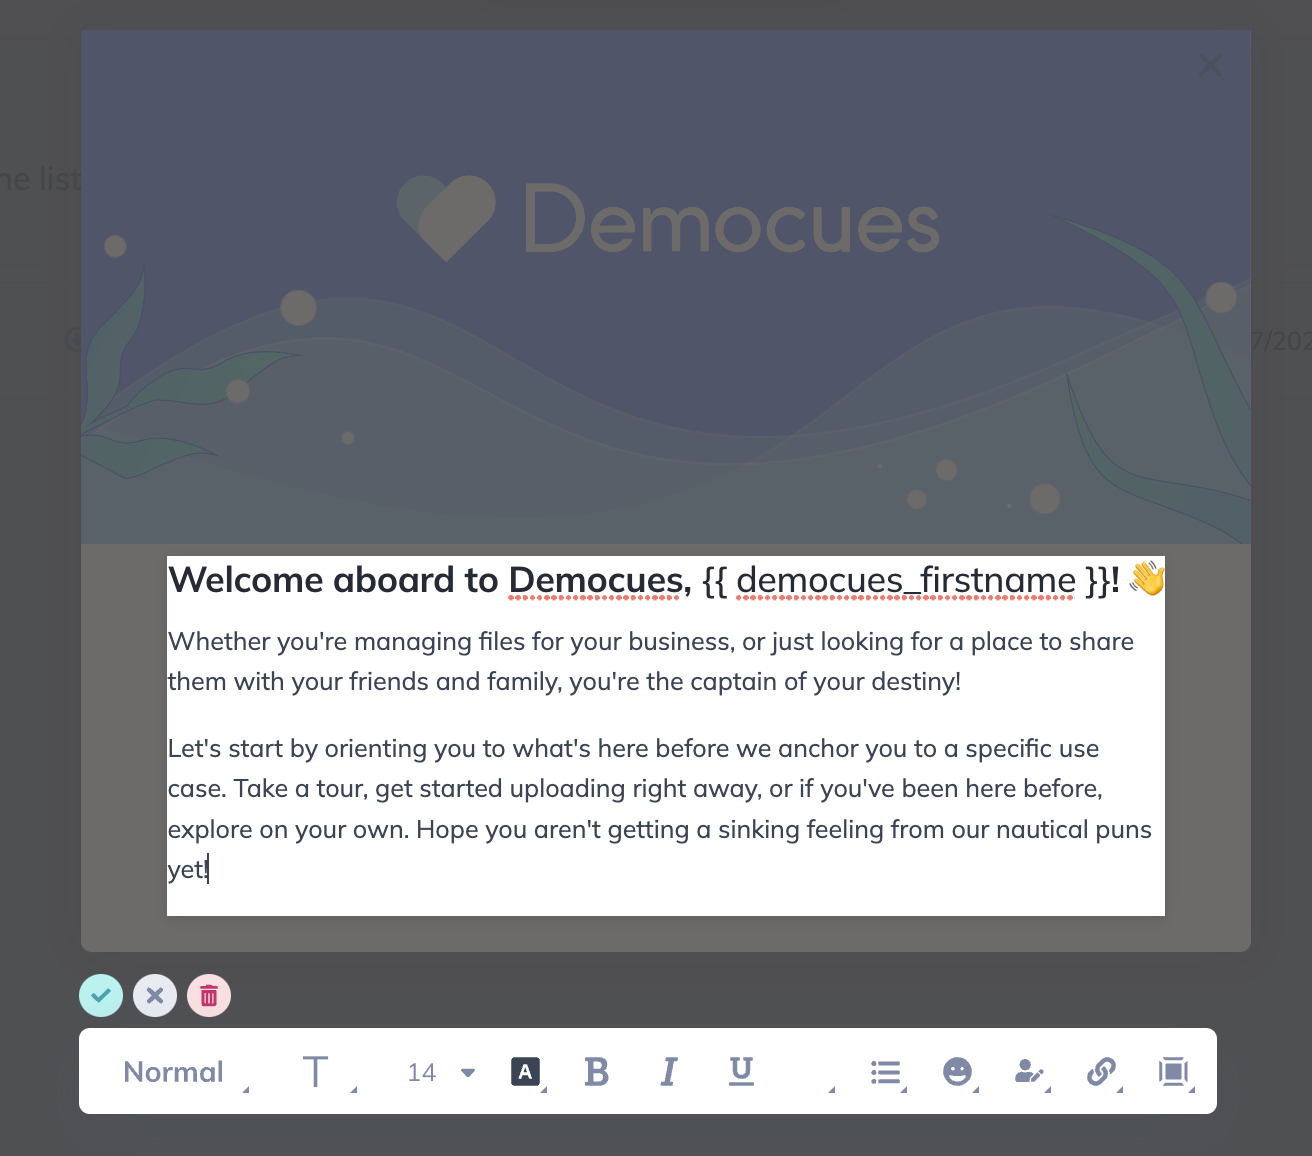
                    Then, add a block of text to enter your welcome message. We added a headline with personalization to welcome the user by their first name. If you're not sending Appcues a "First Name" field, see the User Properties Overview to learn how to start.

                    Below the Headline, add the rest of our welcome text, describing the actions available to the user.
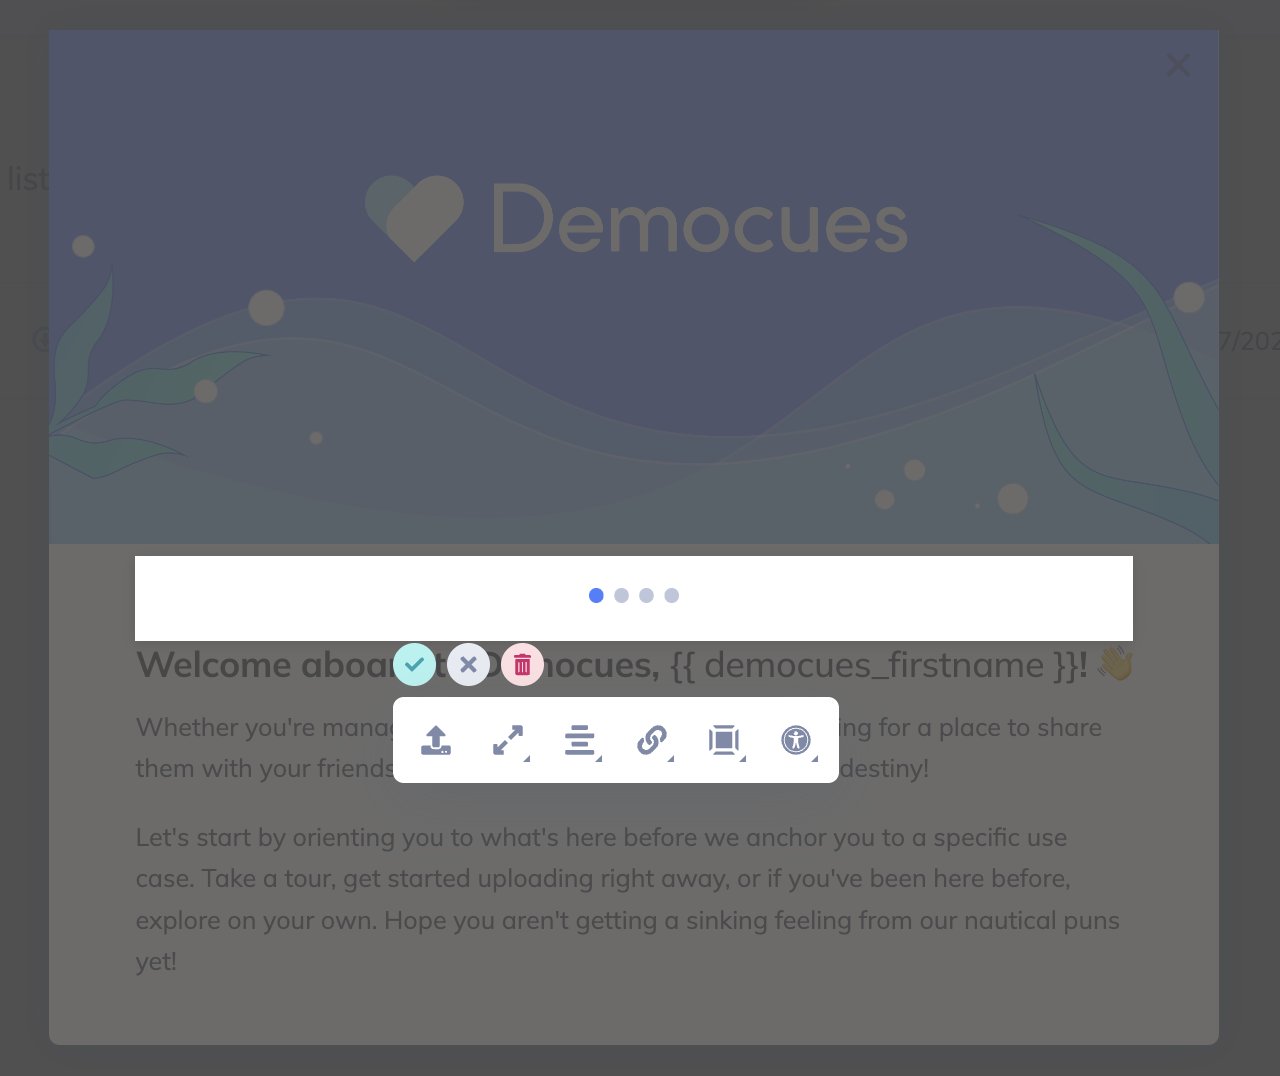
                    We also added a visual sign to let the user know how long the tour will be. For this, we created a PNG image with 4 dots and added it to the step by selecting the Image block.
                    Step 3: Add your Call to Action (CTA) Buttons

                    We added 3 calls to action to this Modal. 

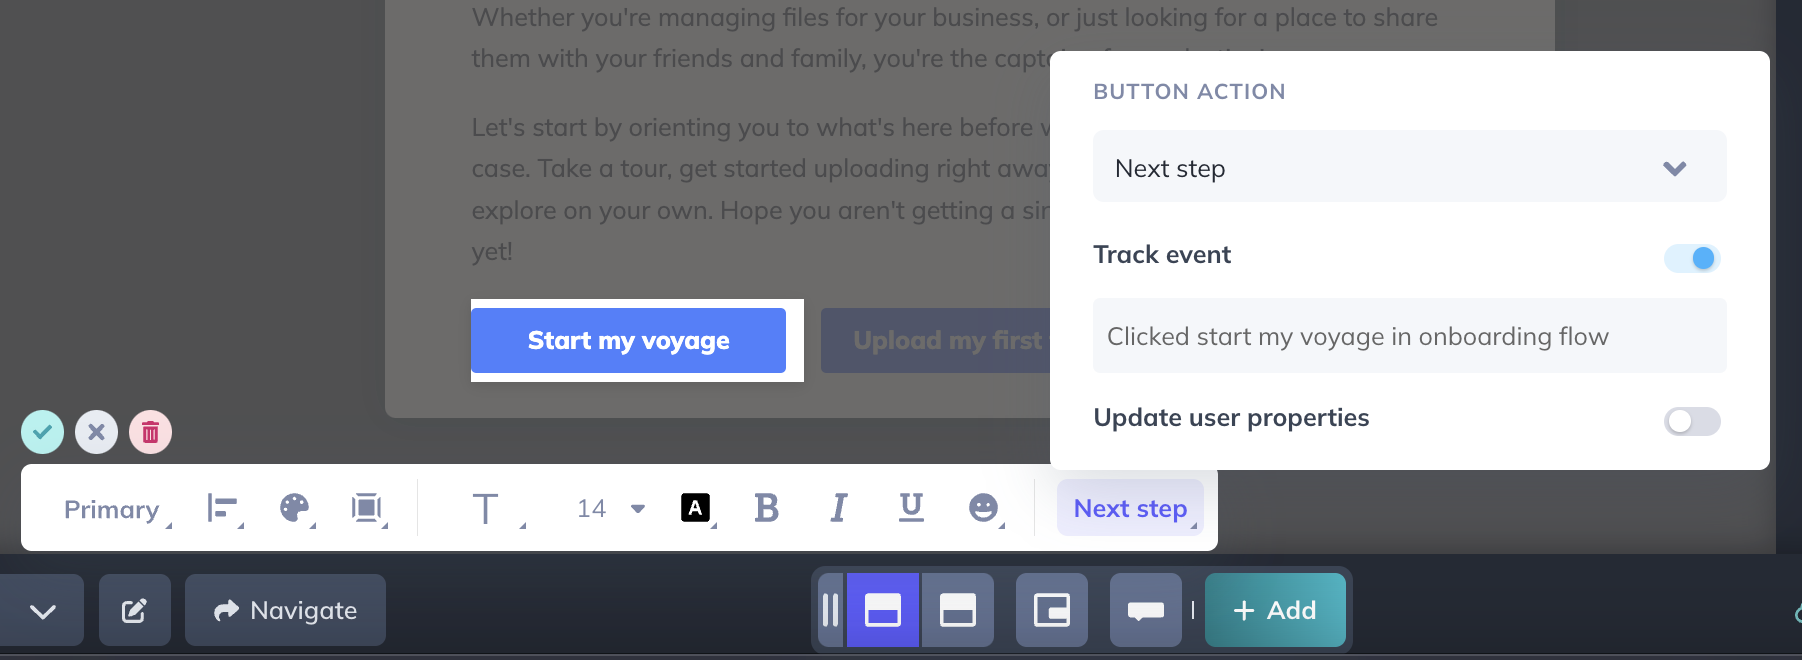
                    • Start my voyage: allows the user to continue seeing this Flow. You can also enable a Track Event on that button to get that data.
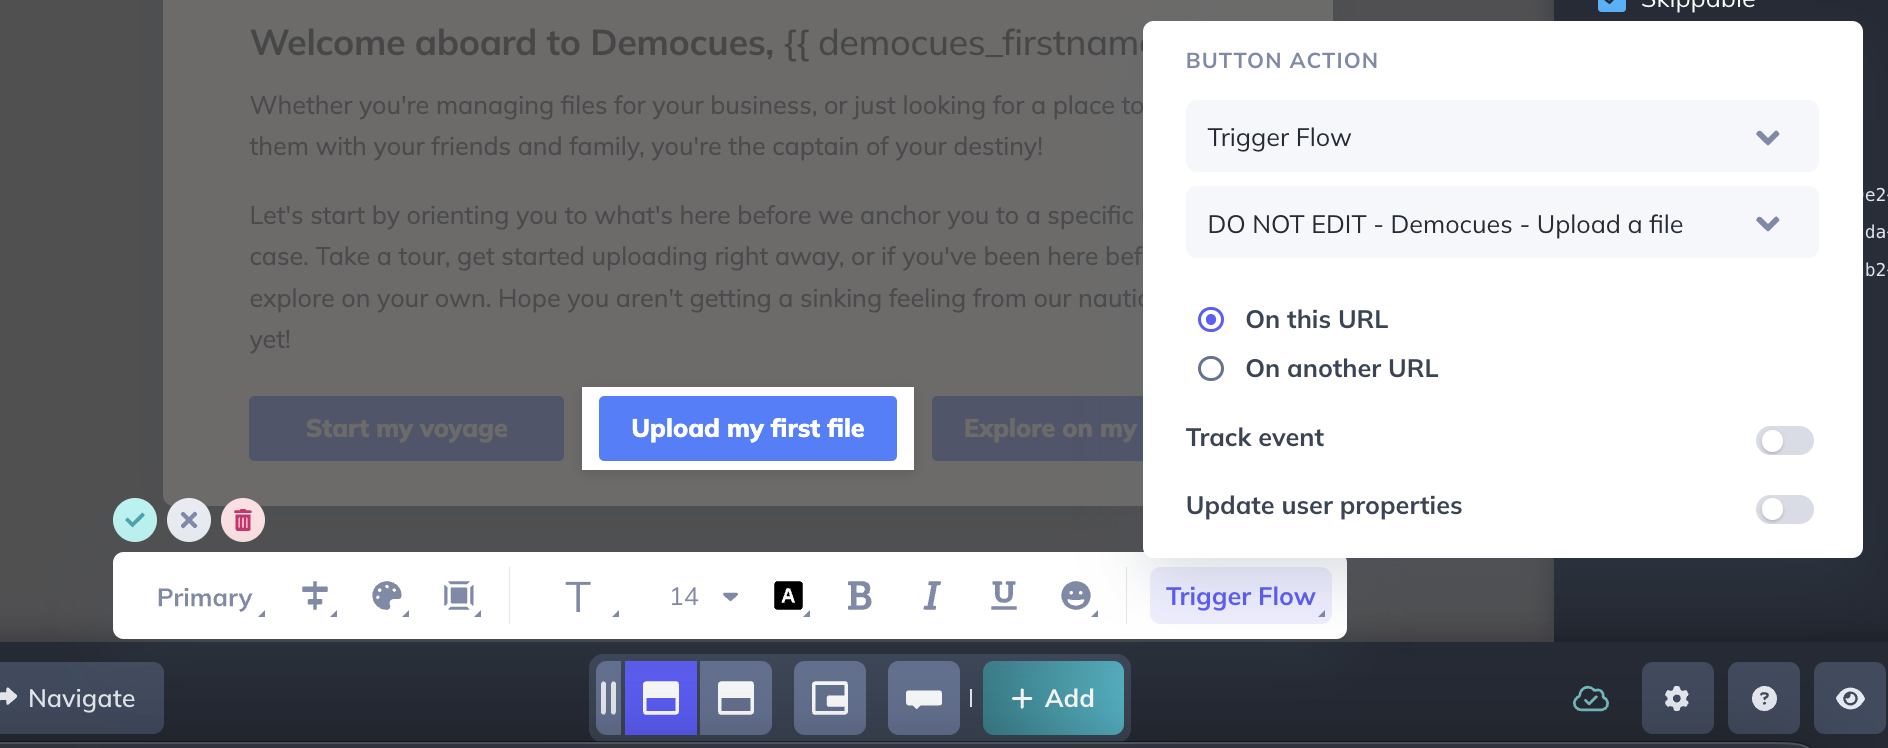
                    • Upload my first file: triggers another Flow. Some users are ready to start diving in right away.
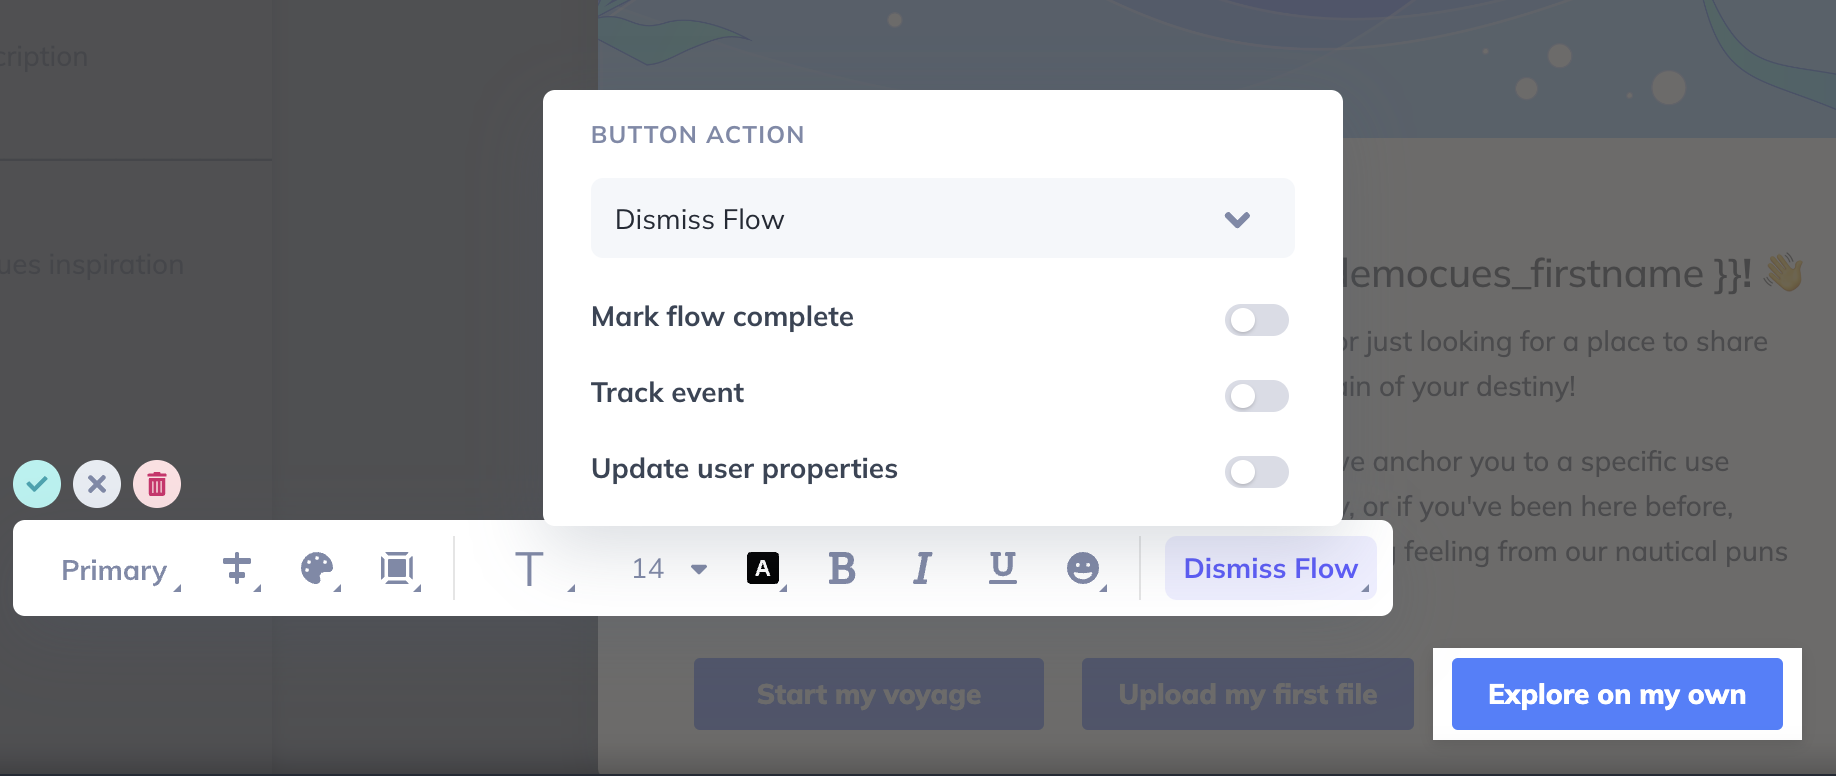
                    • Explore on my own: dismisses the Flow. It's always a good idea to give first-time users an “out”, rather than forcing them to walk through an onboarding flow. 
                    Step 4: Target your Flow

                    There are two main considerations around which users should see this welcome Modal.

                    •  New users only;
                    •  It should show before any other content that may already be live.

                    To be able to target you'll need the applicable User Properties being sent to Appcues. You can see what you're sending on the "Events and Properties" tab of the Settings section. 

                    New user targeting

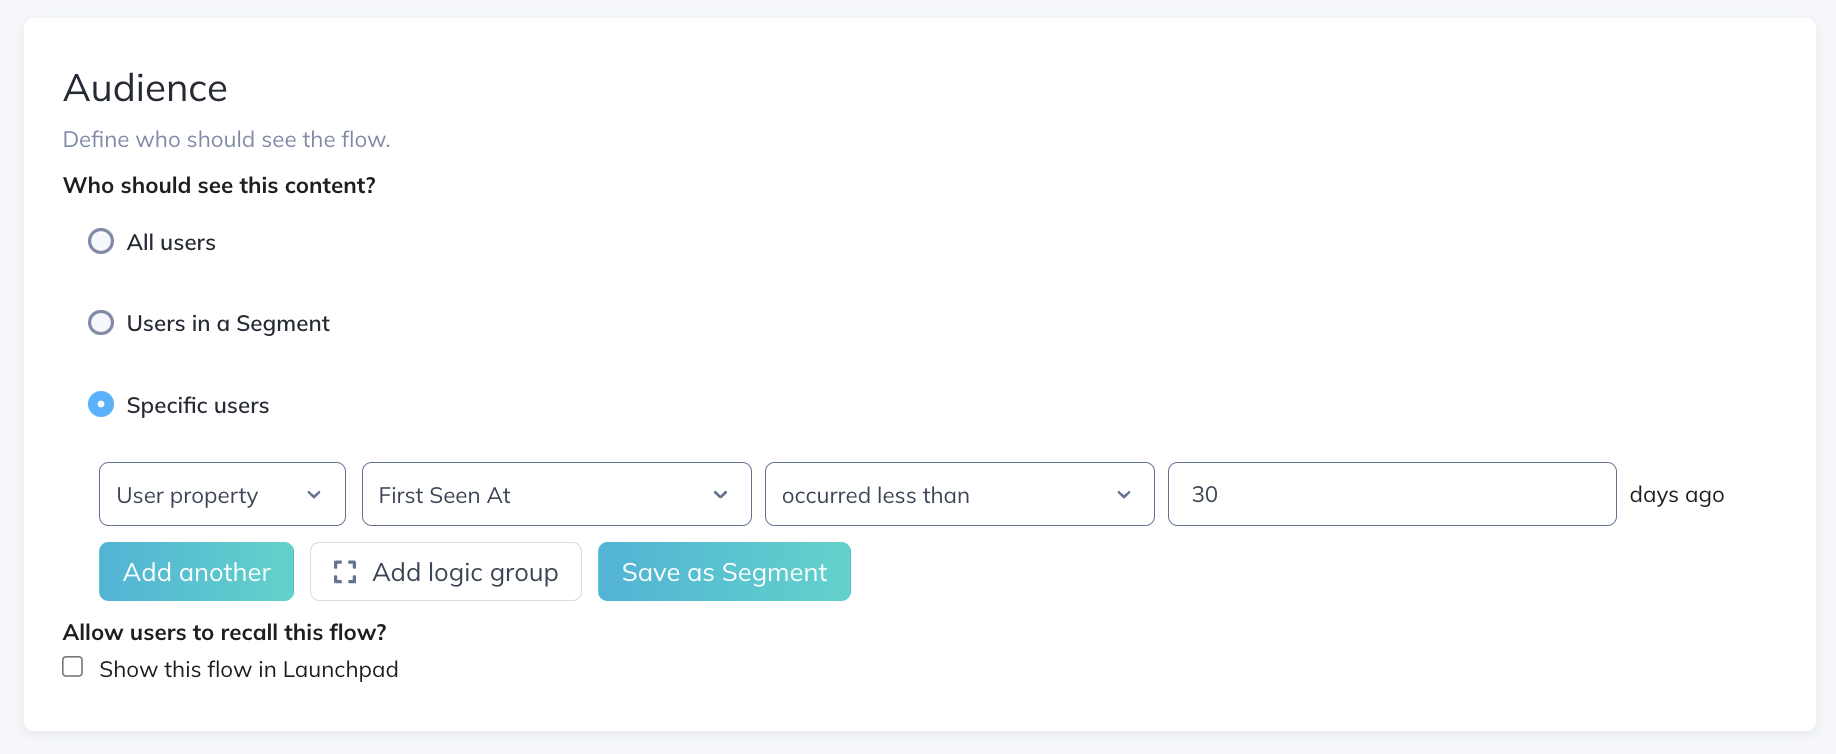
                    This is needed to ensure your existing users don't see your welcome modal. If you're sending Appcues a ‘Created At’ property, you can use it for this.

                    Otherwise, Appcues records the first time a user is seen. If you've been using Appcues for some time now, you can use the property ‘First Seen At’ to only target users first seen in the last 30 days.
                    Flow Prioritization

                    Add a flow weight to your Welcome message so that this is the first thing your new users will see when they land on your application. The higher the flow weight, the higher the priority.

                    See it in action

                    Launch the Flow in the button below to see this Welcome Flow in action!


                    Was this article helpful?

                    Yes
                    No
                    Give feedback about this article

                    Related Articles

                    • Welcome your Users with Personalized Paths
                    • Get Feedback from your Users with a Flow
                    • Create a Product Tour with Appcues
                    • Create a Step-by-Step Guide using Tooltips
                    • Nudge your Users to Upgrade using an Appcues Flow
                    DON'T TAKE OUR WORD FOR IT

                    Start building with Appcues for free

                    Try before you buy
                    No credit card required
                    Support included
                    Start building for freeBook a demo
                    or take an interactive tour
                    Appcues logo

                    Product

                    In-app messaging
                    Email
                    Push notifications
                    Workflows
                    Data
                    How it works
                    Pricing
                    What's new

                    Use cases

                    Onboarding
                    Free-trial conversion
                    Feature adoption
                    Feedback
                    Support

                    Integrations

                    Why connect
                    All integrations
                    All workflows

                    Company

                    About
                    Careers
                    HIRING
                    Why Appcues
                    Teams
                    Customers

                    Support

                    Request a demo
                    Start free trial
                    Developer Docs
                    Help Center
                    Customer Success
                    Contact

                    Resources

                    Product Adoption Academy
                    Courses
                    Workshops
                    Templates
                    Examples
                    Made with Appcues
                    The Appcues Blog
                    PLG Collective
                    Product-led Experience Report
                    The Product Experience Playbook
                    The Product-Led Growth Flywheel
                    © 2025 Appcues. All rights reserved.
                    SecurityTerms of ServiceWebsite Terms of UsePrivacy PolicyCookie Preferences
                    Expand