Segments
Learn more about Segments, an easy way to manage groups of users for repeatable targeting of your Appcues experiences.

Written by Sofia Domingues
Updated at May 14th, 2025
What are Segments?
Segments are a way to manage groups of users for easy, repeatable targeting of your Appcues flows and experiences. Advantages of using saved segments over manual targeting conditions include:
- Convenient reusability: you don't have to type the same conditions many times
- Central management: you can browse your segments and update rules for all connected flows in one place
- Easier collaboration: people who know the underlying data can create segments for others to use
Creating a Segment
To create a segment:
- Go to the Segments page (select the Audiences menu, then click Segments from the sub-menu)
- Click the "Create a Segment" in the upper right-hand corner

- Name the Segment and set the conditions

- See all the users that match your segment as you edit and change in real-time. This helps you refine your segment quickly without having to export.

- The targeting conditions on a segment work exactly the same way as on a flow. To read more about user targeting, read our documentation on Targeting by User Property.
- Save!
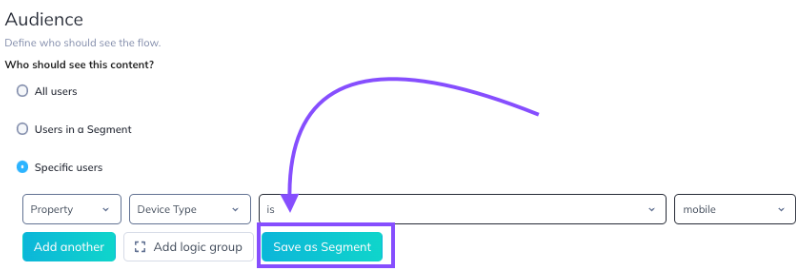
Note: You can also create a segment directly from a flow you're working on. When setting up your audience for a specific flow on the Flow Settings (Targeting & Publish) screen, in the Audience section under "Specific users," you can click "Save as Segment" to name and save the rules you've set. The flow will then switch to use the segment you just created (see Using Segments below).
Segments can also be created via our Public API.
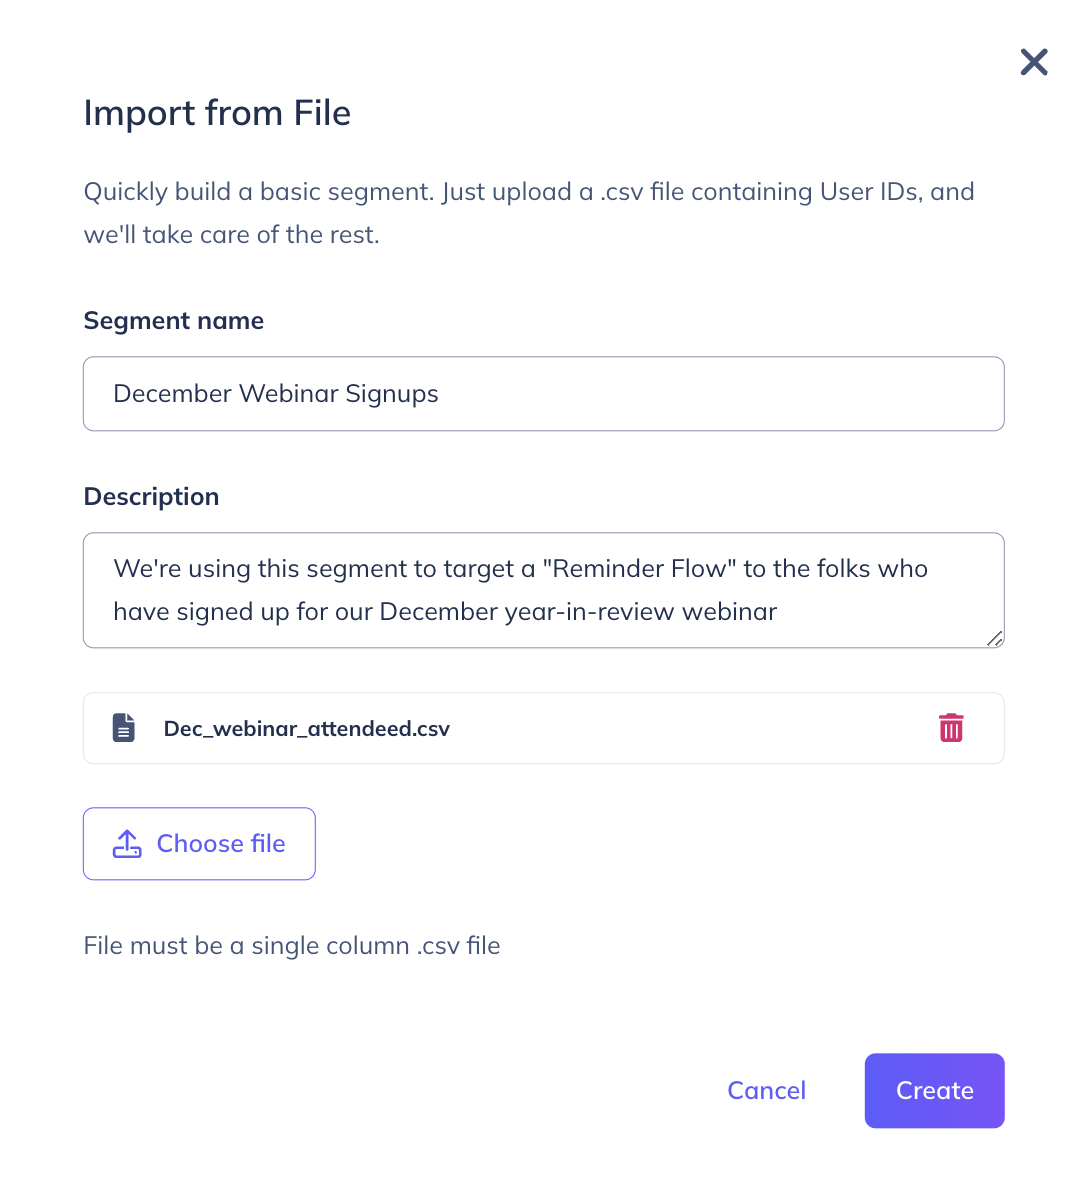
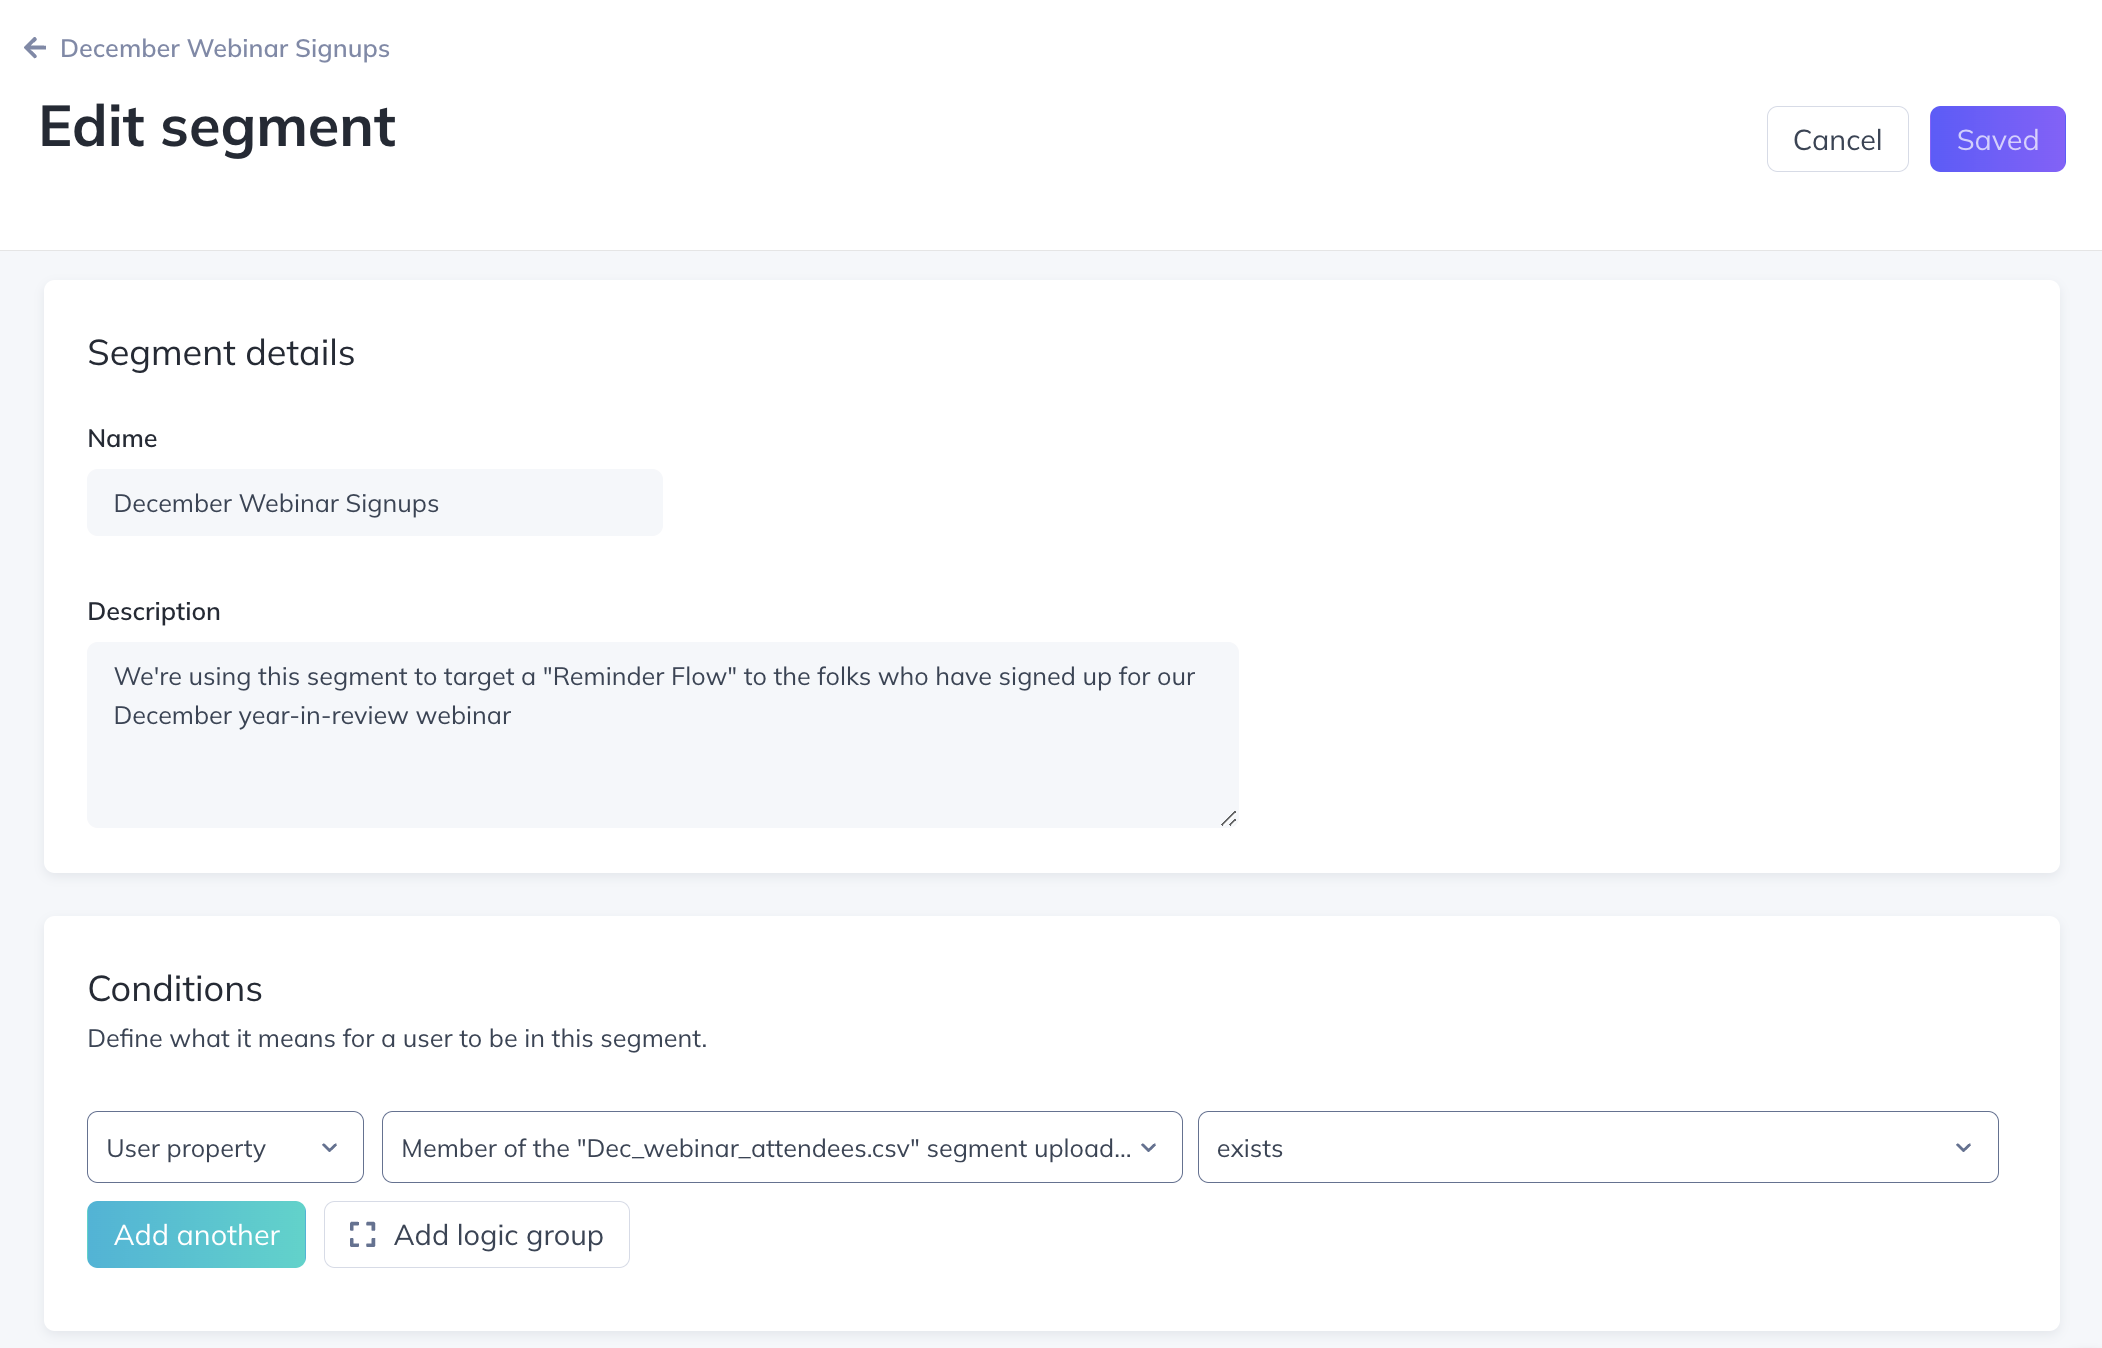
Creating a segment via File Upload
If you need to target a static list consisting of hundreds or thousands of users, you should use this feature to efficiently process them as a single segment. Referring to each user individually in audience or segment targeting conditions is both cumbersome for you and slower for Appcues to process. Use this approach instead.
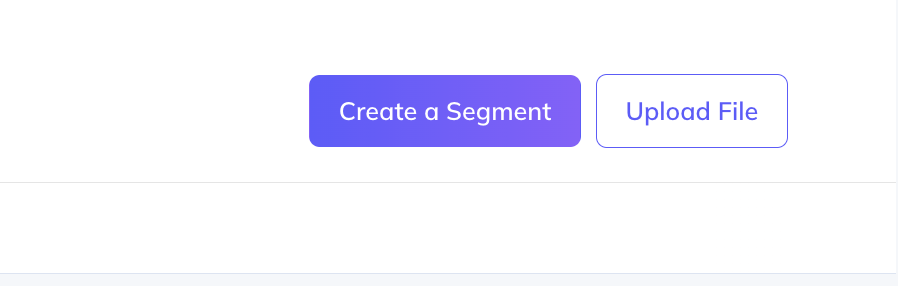
- On the Segments List page, click the “Upload File” button:
- On the next screen, give your Segment a name, provide a description (optional), and choose a file of user IDs to upload (note that only .csv files can be selected, and the file must contain only a single column of user IDs with no empty columns or rows).
- Click the “Create” button.
When viewing the Segment, you will see information about the uploaded file, and you can also re-download the file. Now you can refer to this Segment in the Audience conditions of any Flow or experience, or even other Segments.
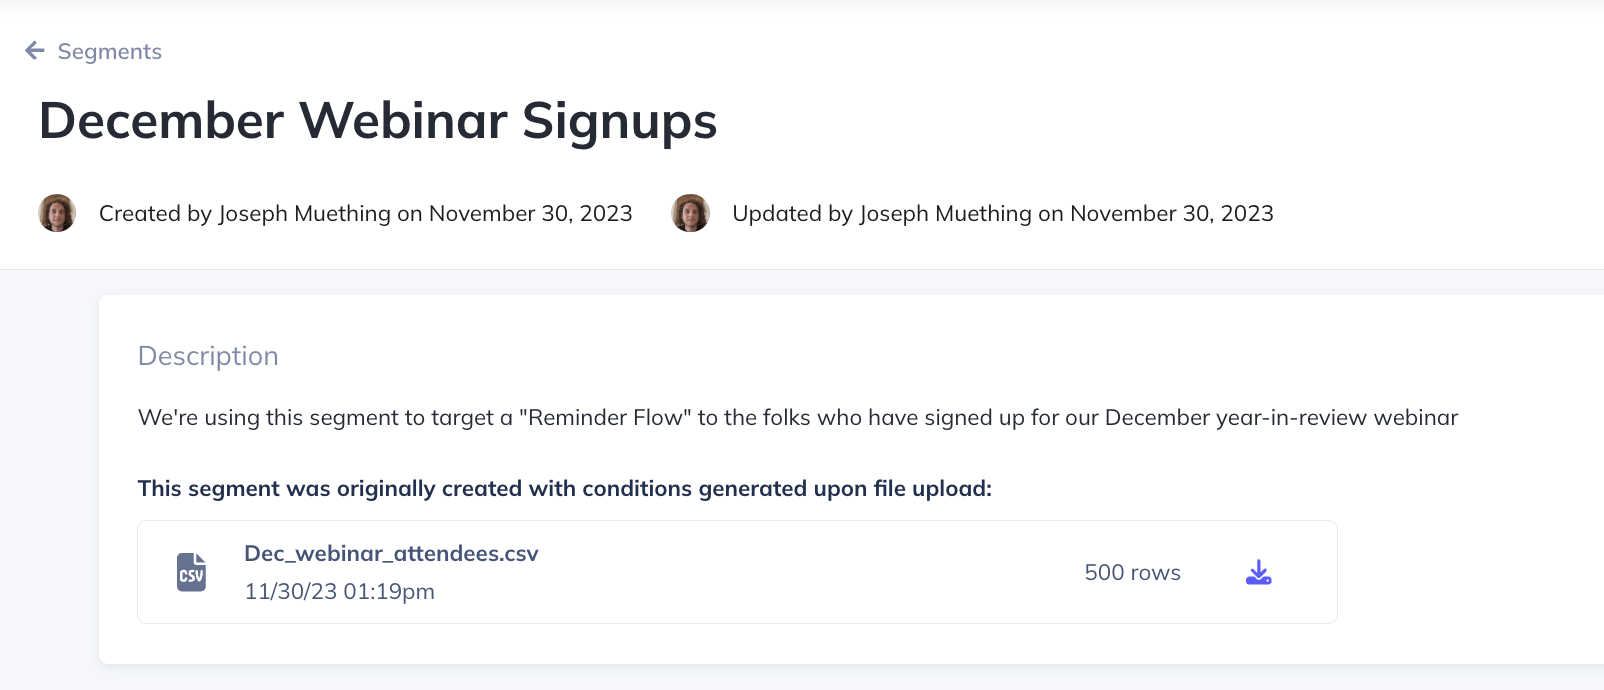
When editing your Segment, you will see that it consists of a single user-property condition. Users in the file have had a property called “Member of the {{filename} Segment uploaded at {{upload time}}” added to their profiles.
Notes:
- Only lists of Appcues User IDs can be processed. Uploading a list of email addresses, for example, will result in new users whose User ID is the email address being created. However, those users will not be targetable. If you need to target a list of non-User IDs, and the list consists of fewer than 1000 items, use an ‘is one of’ condition on a standard segment. If the list consists of more than 1000 items, you can map those property values to Appcues User IDs in a different tool, most likely your CRM.
- You don't need to enter a column name. The first row/entry of the CSV should be a User ID already.
- Once the list is uploaded, it cannot be edited. If you want to revise the uploaded list, either 1) delete the segment and create a new segment with the file; or 2) if you want to add to the original list, create a second segment, upload the additional users in the file; and create an OR condition in one segment consisting of members of the other segment.
- Files can only be uploaded when creating a new segment.
Seeing Users in the Segment
As soon as you create your segment, you'll get a full, realtime count on the segment list page. Any user in your account gets counted, right away.

You'll be able to see a full list of users that belong to the segment on the edit/view pages by clicking on ‘Show Users’.

Additionally, you can manage the columns displayed to include specific user properties in that view.

Combining Saved Segments
You can also combine Segments with other segments and targeting options to show the right flows and experiences to the right group of people.
In the 'Audience' section of the flow settings page, you'll notice an ‘Add Criteria’ button that allows you to specify additional targeting criteria.
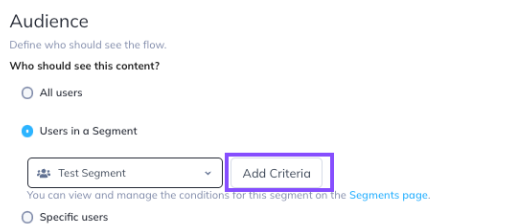
The 'Specific Users' section will open where you can start to build on to the initial Segment you created. You can add as many additional properties as you'd like to the existing Targeting criteria, including additional Segments.
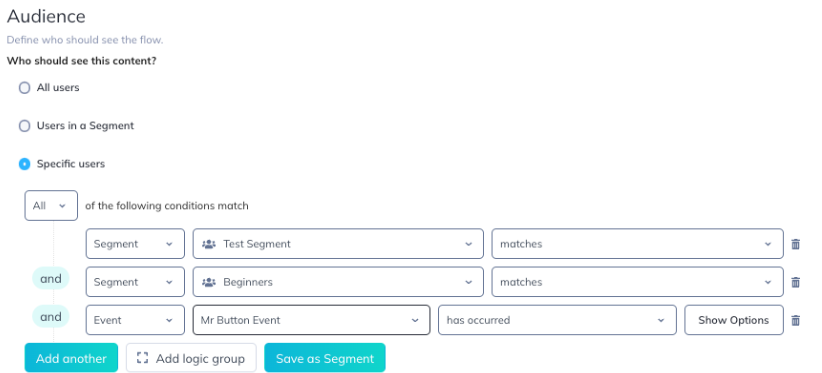
Choose if you want to target those who fit, or don't fit into the Segment that you're working with, by toggling between 'matches' and 'doesn't match' in the dropdown.
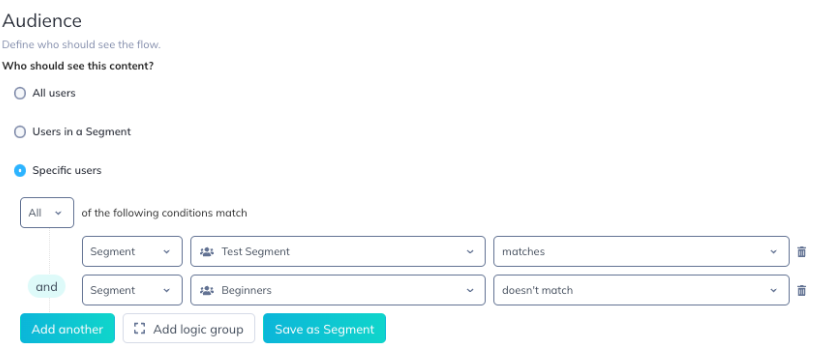
You can save the above group as a new Saved Segment as well (#meta), but keep in mind that any change to the Segment down the line will affect all flows that use it in the targeting.
Using Segments
Segments can be used to target a flow/checklist/experience or as a filter on the Events Explorer.
To use a segment for targeting, on the flow's settings page:
- Choose "Users in a Segment" in the Audience section
- Choose the segment for whom you want the flow to appear.
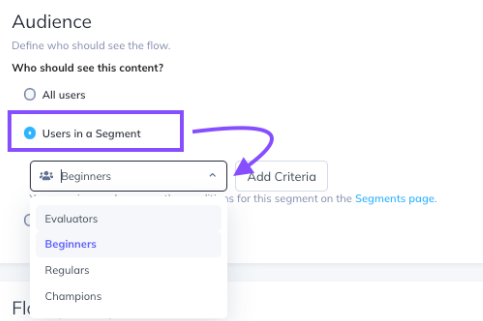
The flow will now show only to users who match the criteria specified in the segment, with exactly the same result as if you had set those rules directly on the flow using "Specific users."
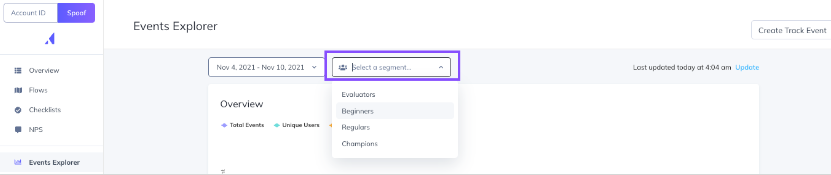
To use a segment for filtering, on the Events Explorer:
- Select which segment for whom you'd like to view data using the Segment filter at the top of the page
Important to Note
The Events Explorer will now show data for only users currently in the specified Segment. It's important to note that Appcues only collects a trailing 7 days of data when Segments are created. Therefore, if you apply a newly created Segment to the Events Explorer and look at 90 days of data, Appcues will take users who were in the Segment over the last 7 days, and look back at 90 days of event data to see who achieved the event. As your segment matures in age, this gap in date coverage will close. For example, if a Segment is 23 days old and you look at a report for 30 days of event data, you will have full coverage for the time period selected (7 days of trailing data + 23 days of active tracking data = 30 days of historic data).
Managing and Updating Segments
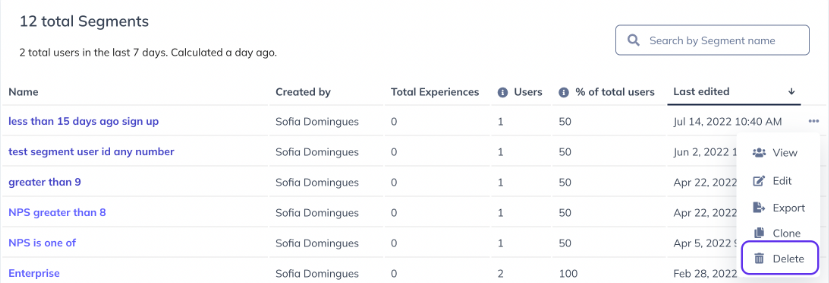
You can see all your segments on the Segments page.
To delete a segment, click the ellipsis (•••) menu on the segment, then click Delete. Note: you can't delete segments that are connected to a flow. Please remove the segment from each flow on the flow's settings page before deleting the segment.
To edit a segment, just click it. You can then rename the segment or update the targeting rules just as you did when you created the segment.
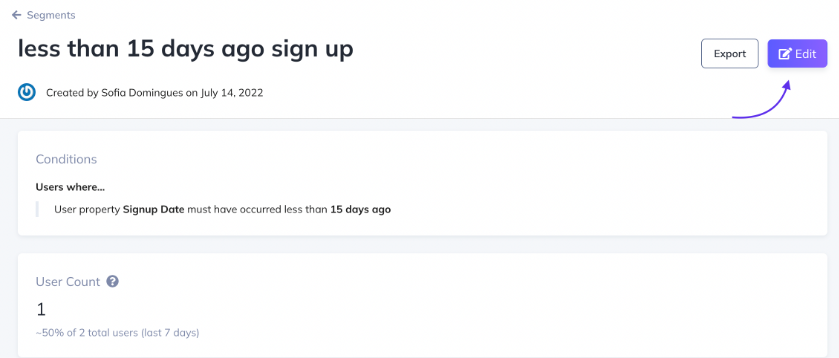
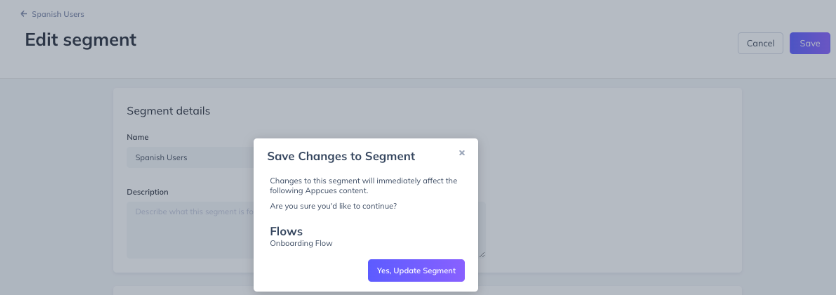
When saving an updated segment, all new targeting rules are applied to all flows/experiences that use that segment immediately. You do not need to republish any connected flows for the changes to take effect.
If there are flows connected to the segment you update, upon saving, you'll get a warning with the name of each flow that will be affected.
Segments can also be edited via our Public API.
Exporting segments
You have the ability to export a segment into a CSV. It will include all users who currently match that segment, looking back 2 years. The export option is available as soon as a segment is created.
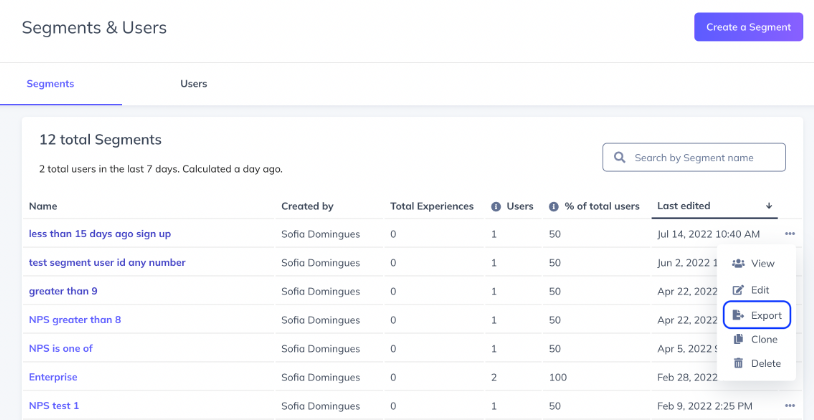
To export a segment, go to the Segment & Users page. Click the ellipsis (•••) menu on the segment you want to export and select export:
You can also export your segment from the segment's page:

Exports allow you to pick and choose which user properties you want included as columns:

FAQ
Can I use my Segment mashup in my goals?
At the moment, we don't support using a combined Segment in your Goal targeting.
Does adding new properties change an existing Segment?
No, adding new properties does not change existing segments unless you use that new property in those segments. To modify your original segment you'll need to update it from the 'Segments' tab.
What if I change a Segment that is part of a Segment group?
Those changes will instantly take effect on everything that uses that segment in targeting. For example: If you edit Segment A and that segment is used on Segment B, that change would be taken into account immediately.
Can segments be adjusted via an API?
Yes! Segments can be created, edited, or deleted via our Public API.