Use a Pin for Quick Help in your Product
Learn how to use a Pin to provide quick contextual help for users as they use your product.

Written by Sofia Domingues
Updated at May 14th, 2025
Pins provide contextual help for users as they gain a deeper understanding of your product. They reduce the friction around learning a feature and reduce the potential burden on your support team.
The final product of your Pin will look something like this when we're done:

Build Guide
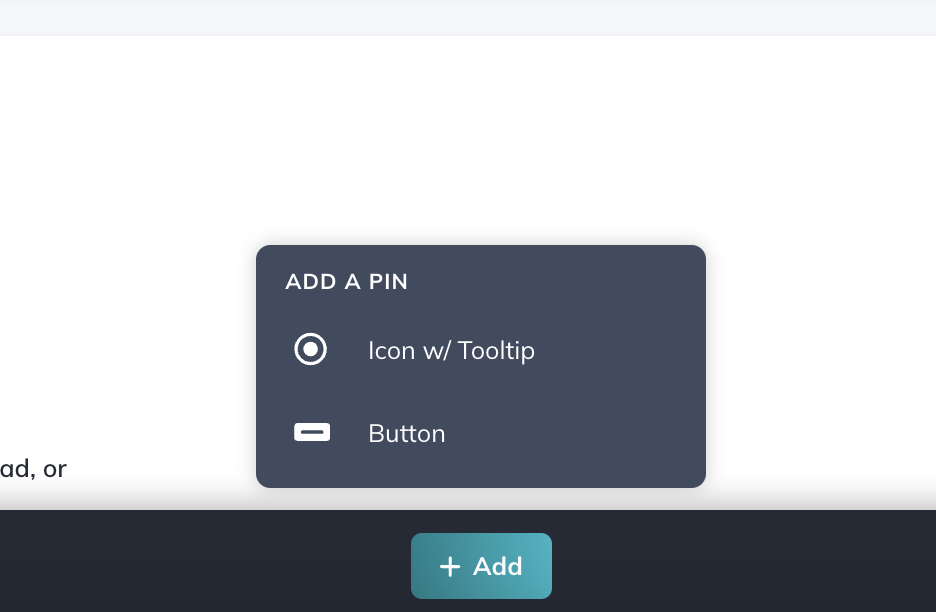
Step 1: Create a Pin
Start by creating a Pin in the Builder. For this example, we'll select ‘Icon w/ Tooltip’.
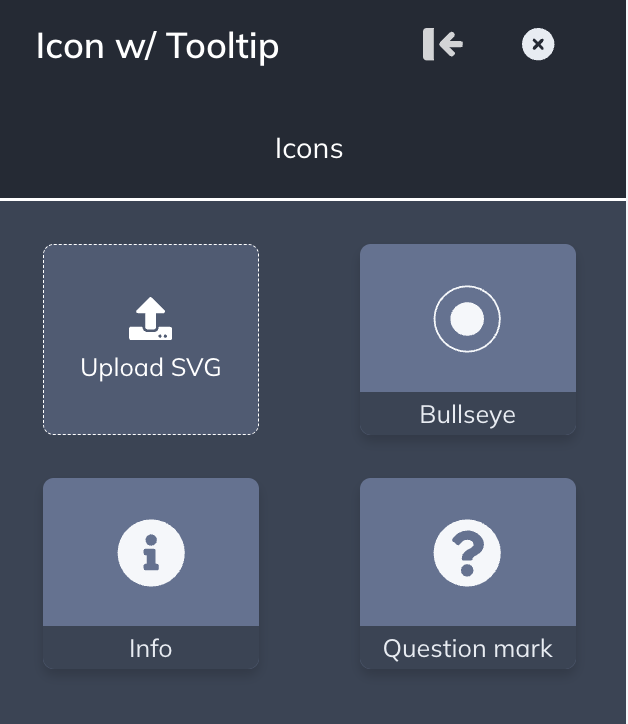
Select the icon you'd like to use for your Pin. We'll go with ‘Question Mark’.
Attach the Pin to the element on the page. When you're placing a pin on the page, Appcues automatically will pick up a CSS selector available and assign it to the Pin.

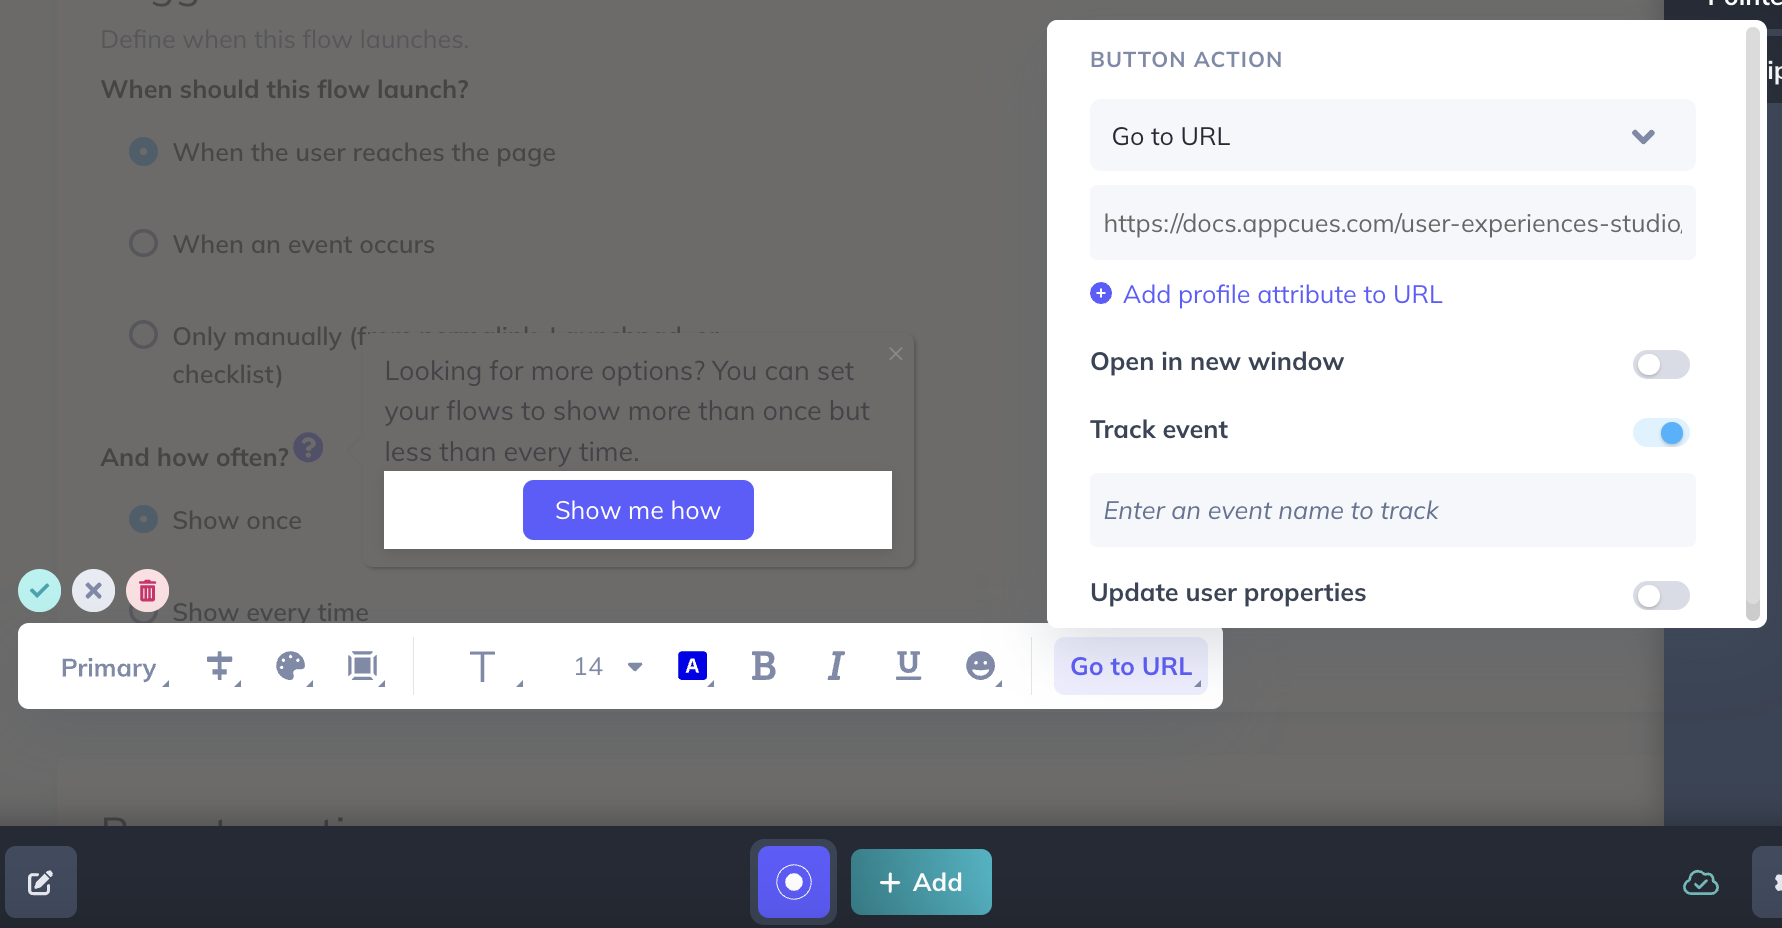
Step 2: Add the content
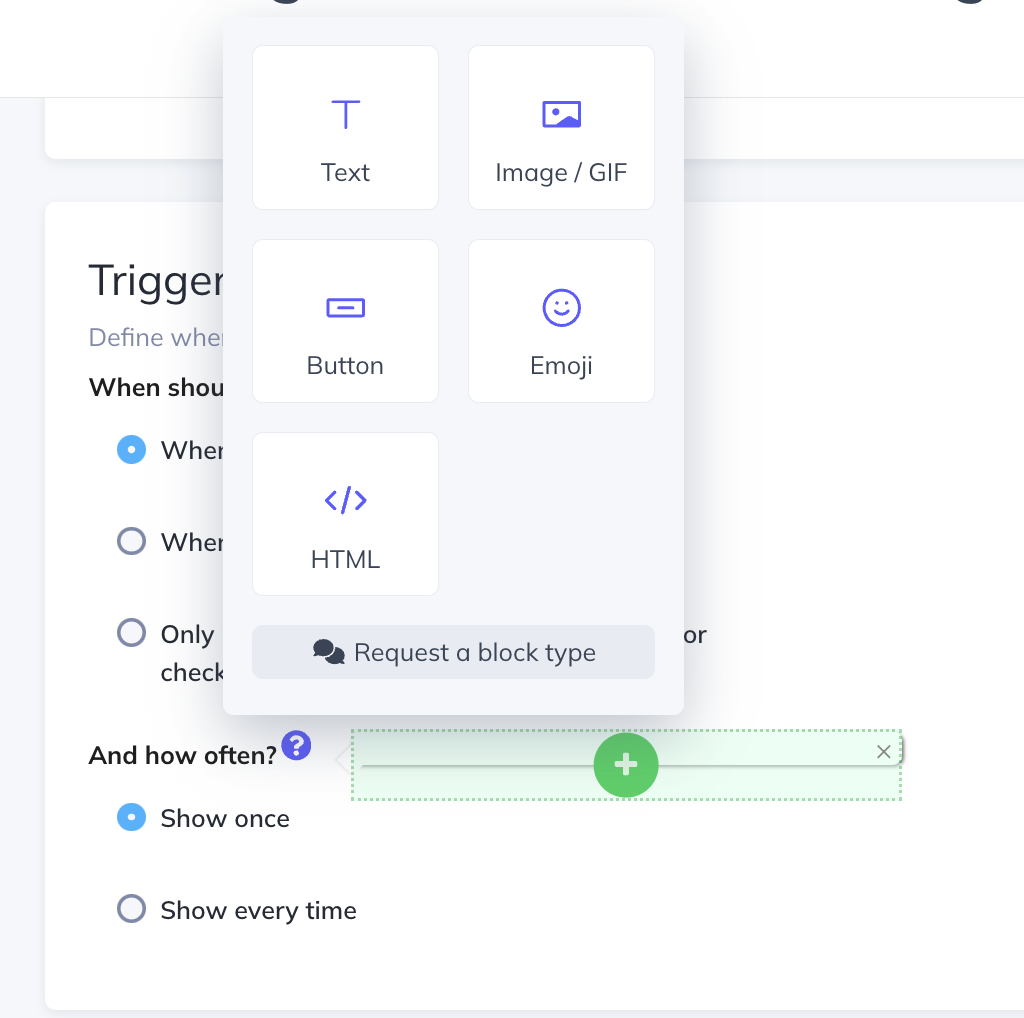
Below our text, we'll add a button set to ‘Go to URL’. This button will take the users to our Help Article where they can learn more about how to set this up. As an option, we can also track an event on any click on that button to get that reporting.
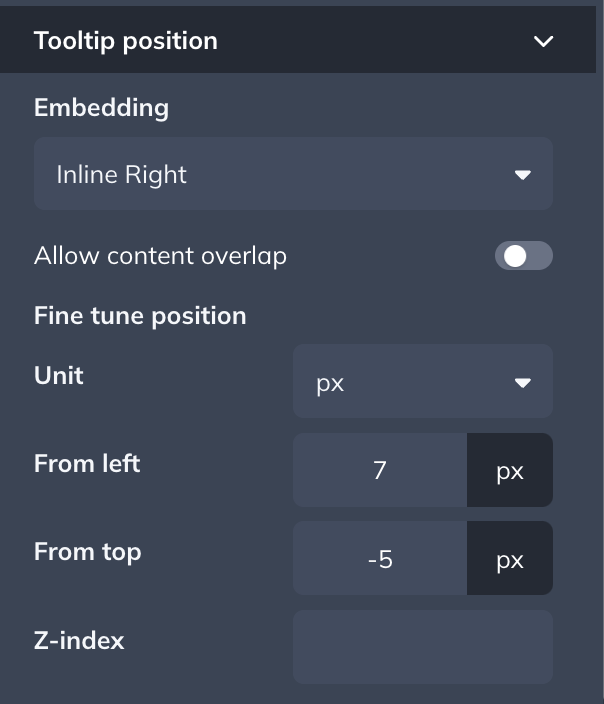
Step 3: Refine the position of your Pin
There are a few cases where you may need to refine the position of your Pin. You may need to find a CSS selector that is more stable and easier to find on the page and you may also need to fine-tune the placement of the pin.
Select the ‘Tooltip Position’ tab to do this. To move the pin after placing it on an element, select a unit (px or %) and enter positive or negative values to move it from left or from top.
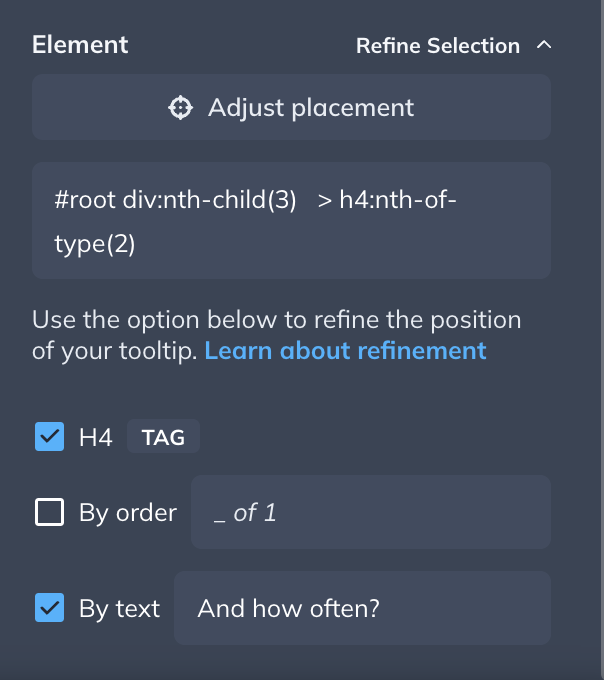
To further refine the CSS selector of your pin, click on ‘Refine Selection’. Here, you can enter a custom CSS Selector if you have one (in the text input box) or you use the options available, including an Order filter or a Text Filter.
Step 4: Set a Theme
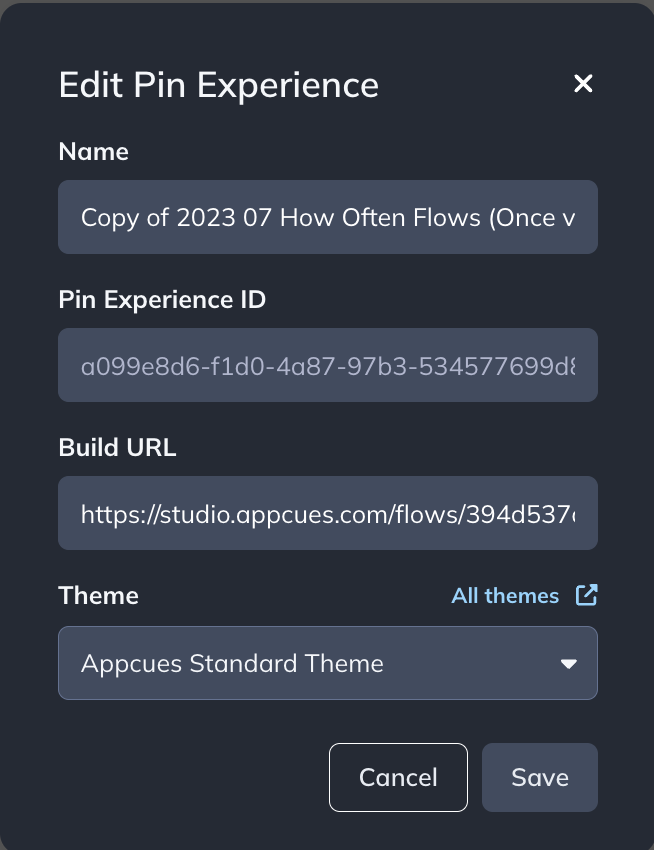
If you didn't select a Theme at first, the default theme will be applied. If you'd like to change it, click on the Pin experience details button at the bottom of the Builder.
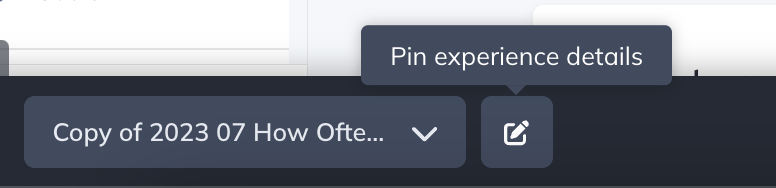
From there, you can see all your pin details, including the Theme.
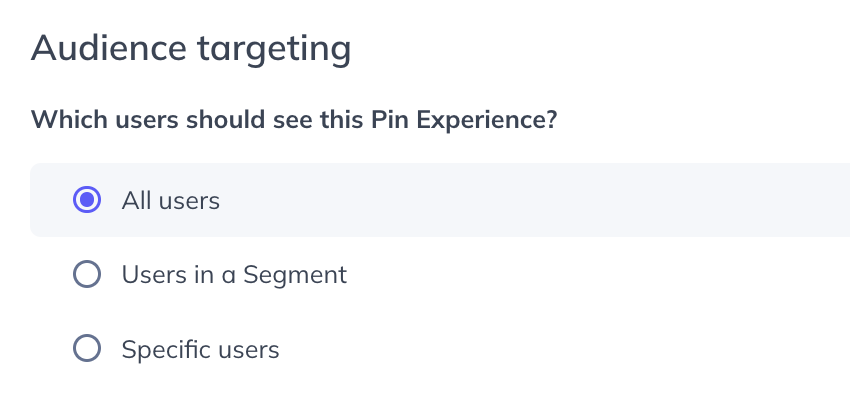
Step 5: Target the Pin
Pins are a persistent type of experience which means they'll show on the page at all times until the user becomes ineligible to see them (for instance, the pin is targeting a specific user property and the user no longer matches it). Pins also don't interfere with other live content on the page, so you don't have to worry about that.
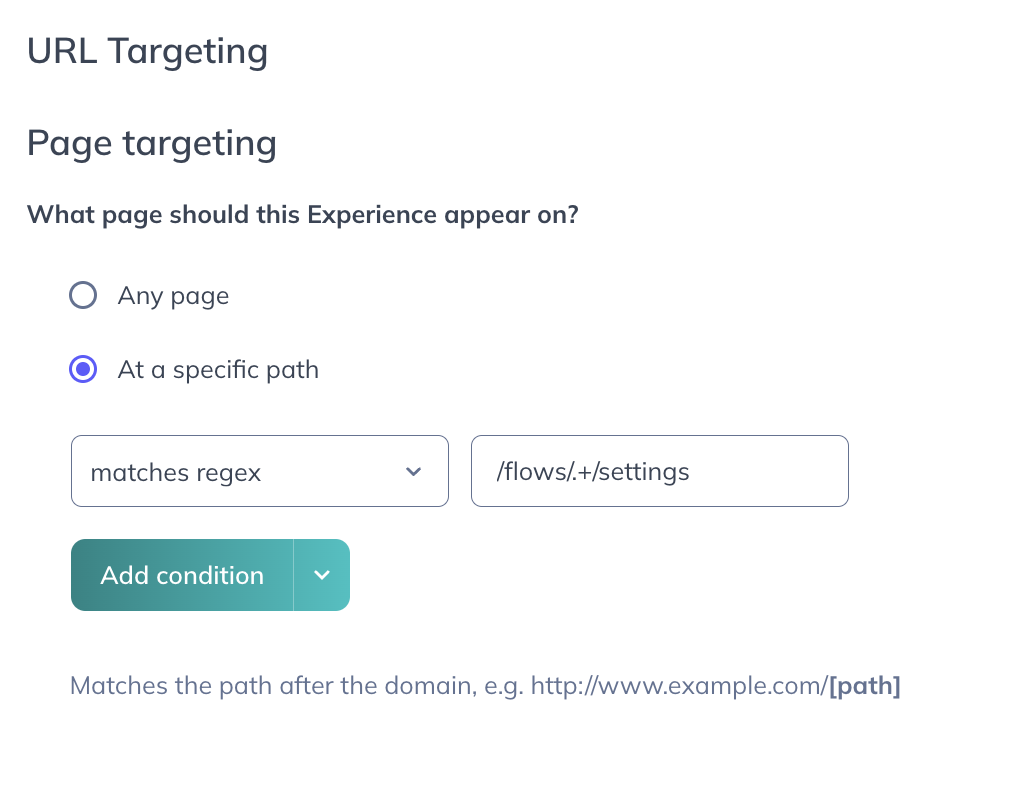
In terms of page targeting, we want to make sure it shows on all settings pages of any flow. This means that the pages are dynamic. To ensure the pin will show on any of those pages, we're using a regex pattern to match any character or number.
In terms of audience, we're targeting all users to ensure that everyone can learn more about this at any time.